I think we all love our Alexa as it is such a sophisticated device to make your life at home so much easier and effortless.
However, as with all smart devices and apps, they do need to be updated from time to time to get the latest updates and features. And one issue that I have encountered myself is that after updating my Alexa app, I sometimes find that I am not able to locate a scene.
I have made a video in which I demonstrated how I solved this issue and you can watch it before you continue reading this article. You can watch it below.
For my first method, I added “Group”, scroll to the bottom and I found my old scenes. The second way is to change the scene name by using the manufacturer app.
Alexa Scene Missing From Menu: 2 Ways to Solve This Issue
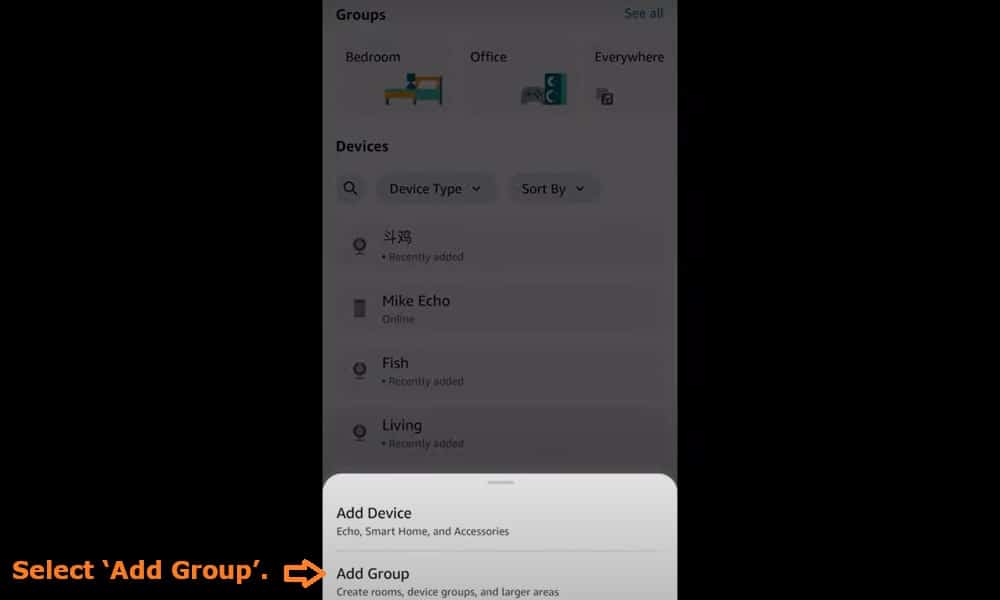
To rectify this problem, go to the ‘Home’ screen on your Alexa app and navigate to the ‘Devices’ screen and select ‘Add Group’. From the ‘Create Groups’ screen select the option ‘Create a room or device group’.
You will be taken to the ‘Name the room or device group screen’. Choose any room such as ‘Living Room’ and click on ‘Next’.
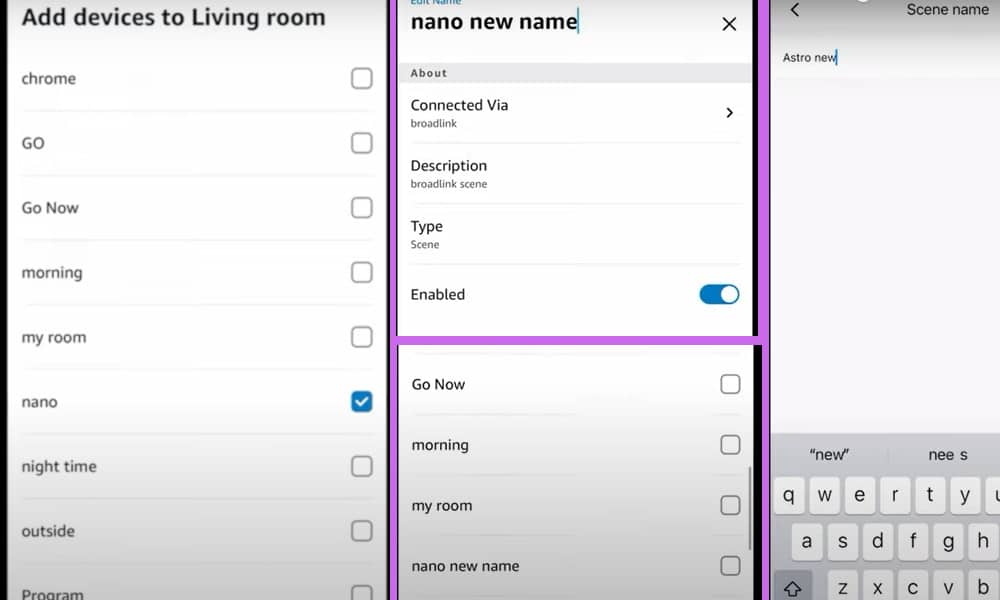
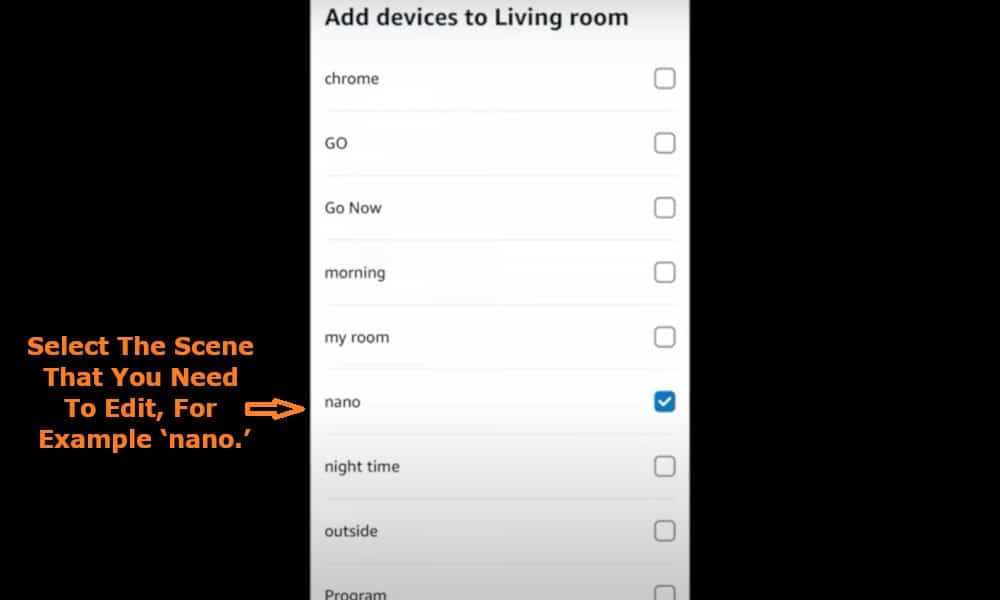
You will then be presented with the ‘Add devices to Living Room’ screen. Now scroll down to the bottom of the screen. Here you will see ‘Scenes’ and your list of scenes.
Select the scene that you need to edit, for example ‘nano’ and click on the ‘Next’ option. This will then take you to the screen titled ‘Add Alexa devices to Living room’. Click on the ‘Next’ option followed by the ‘Skip’ option.
You will be presented with a screen informing you that ‘Living room is ready’ and you simply need to click on the ‘Done’ option.
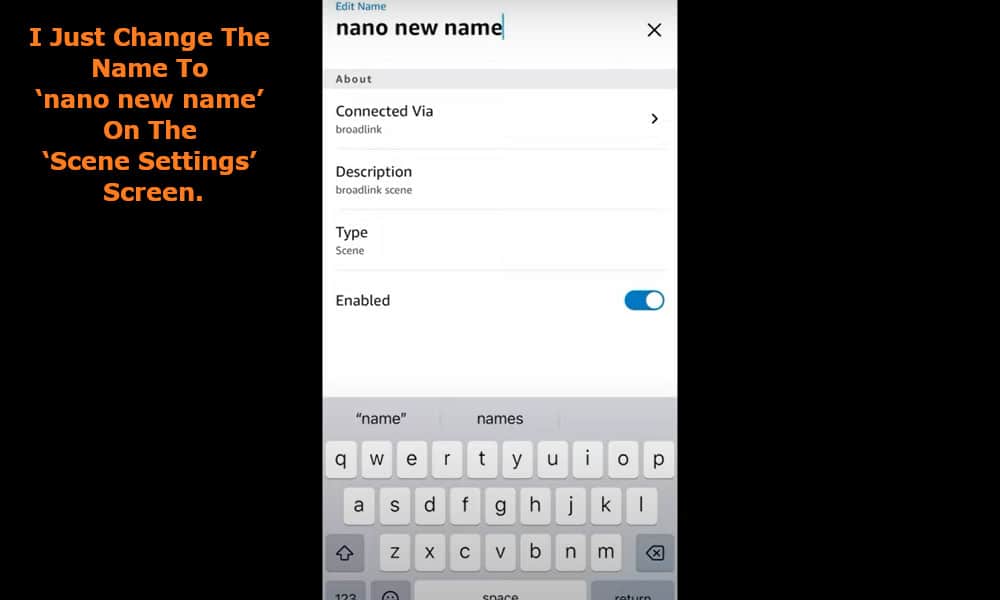
This will return you to the ‘Living room’ screen from where you can click on the ‘Edit’ option and simply edit the name of the scene that you want to change. I will just change the name to ‘nano new name’ on the ‘Scene Settings’ screen.
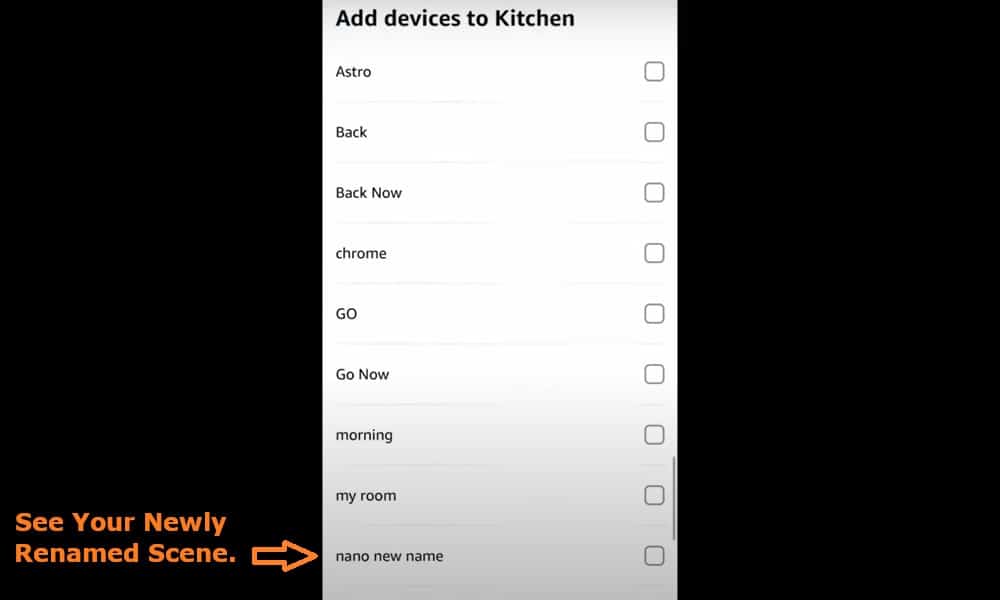
To check that the change has been made successfully, you can work your way back to the ‘Name the room or device group screen’ and by selecting a different room – kitchen for example.
When you again scroll to the bottom of ‘Add devices’ to the kitchen screen, you should see your newly renamed scene.
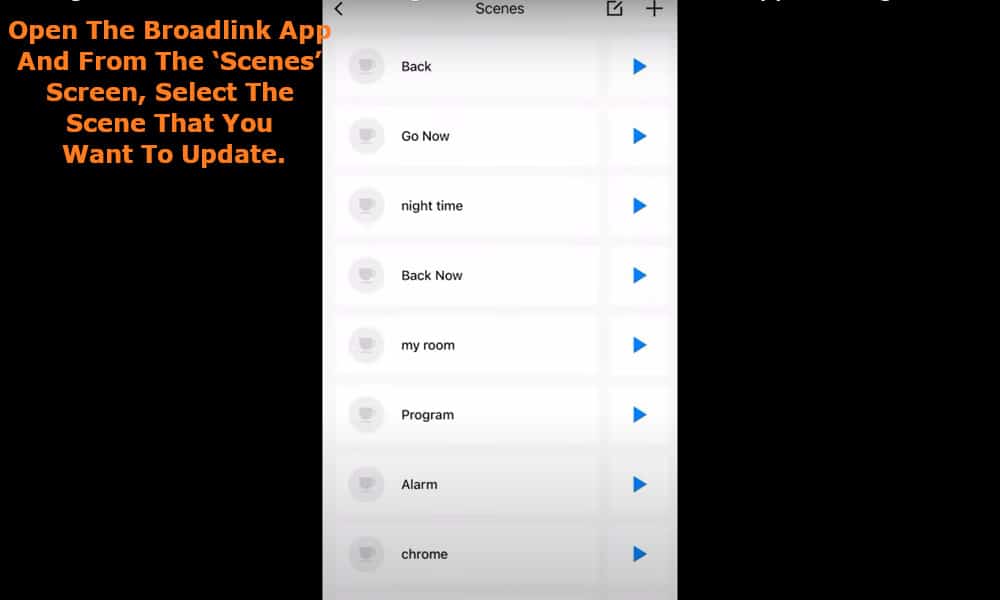
There is also another method that you can use to change the scene, this time using the Manufacture’s app. For example, if the scene is a Broadlink device scene, open the Broadlink app.
From the ‘Scenes’ screen, select the scene that you want to update which will then take you to the ‘Manage scenes’ screen. Choose the scene that you want to change and you will be taken to the ‘Scene details’ screen.
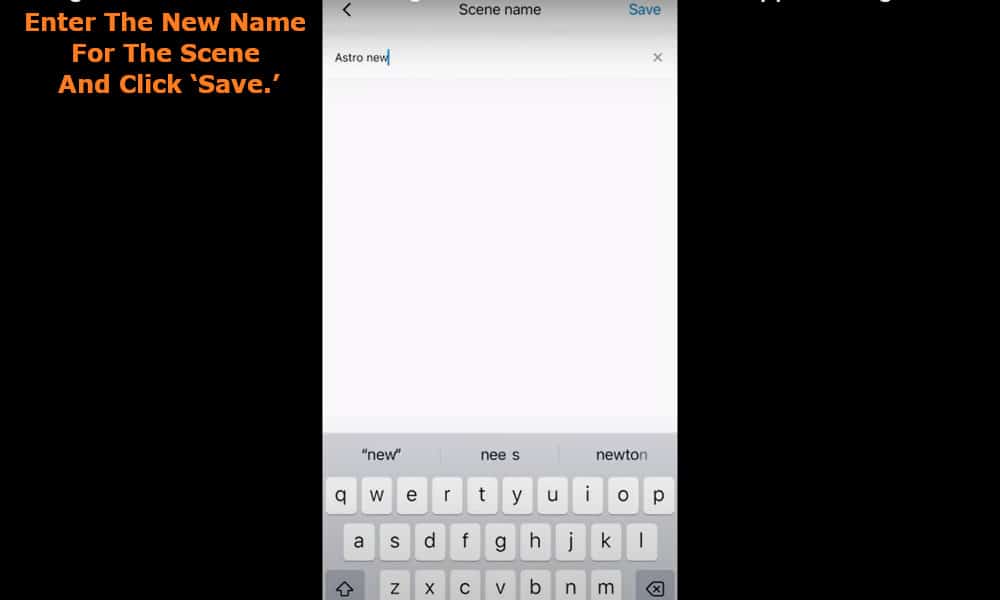
Click ‘Edit’, enter the new name for the scene and click ‘Save’ followed by the scene icon.
Now if you return to the ‘Scenes’ screen you will see the new name together with the icon you selected.
Returning to your Alexa App to ensure that the new scene name has been successfully changed, navigate to the ‘Name the room of device’ screen. Select a room, for example ‘Main bedroom’.
Click on ‘Next’ which will take you to the ‘Add devices to ‘Main bedroom’ screen. Scrolling to the bottom you should now see the newly named device listed under ‘Scenes’.