The Dyson Air Purifier is another of those devices that I like to be able to control using the Dyson app on my smart phone rather than using the remote control that comes with your Dyson Air Purifier.
However, whilst this is convenient, on occasion you might encounter the same problem that I have, which is that your Dyson Air Purifier fails to connect to your Wi-Fi.
It is annoying, but not a big issue to rectify as the problem generally occurs due to your Wi-Fi having become unstable – through a power outage for instance.
By the way, I also made a short video about how to solve this issue. You can watch it below.
First, I make sure that I turned on the WiFi on the Dyson air purifier. For the second way, I reset the machine and reconnect the air purifier to the Dyson app.
Read: How to Fix Dyson Air Purifier Flashing Red Filter
2 Methods to Fix Dyson Air Purifier Not Connecting to Wi-Fi
So how do we reconnect our Dyson to the Wi-Fi so that we can use it via our app rather than by its remote control? Well, there are a couple of options we can look into to fix the problem.
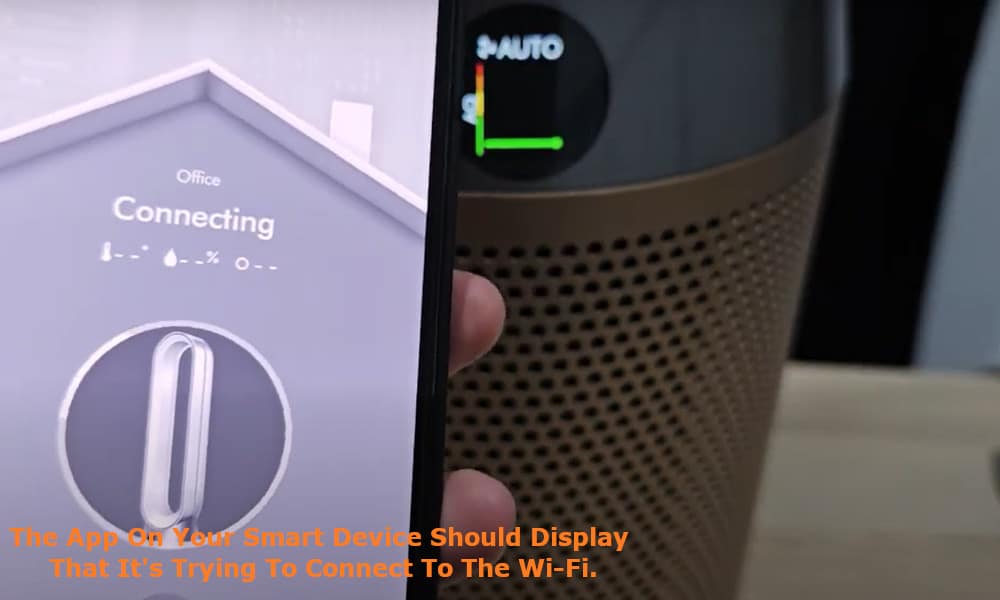
Typically, the app on your smart device will display that it is trying to connect to the Wi-Fi but fails to do so.
In this case, make sure that you have turned on the Wi-Fi on your Air Purifier – hold down the power button on the top of your Purifier until the display panel shows the Wi-Fi- signal image.
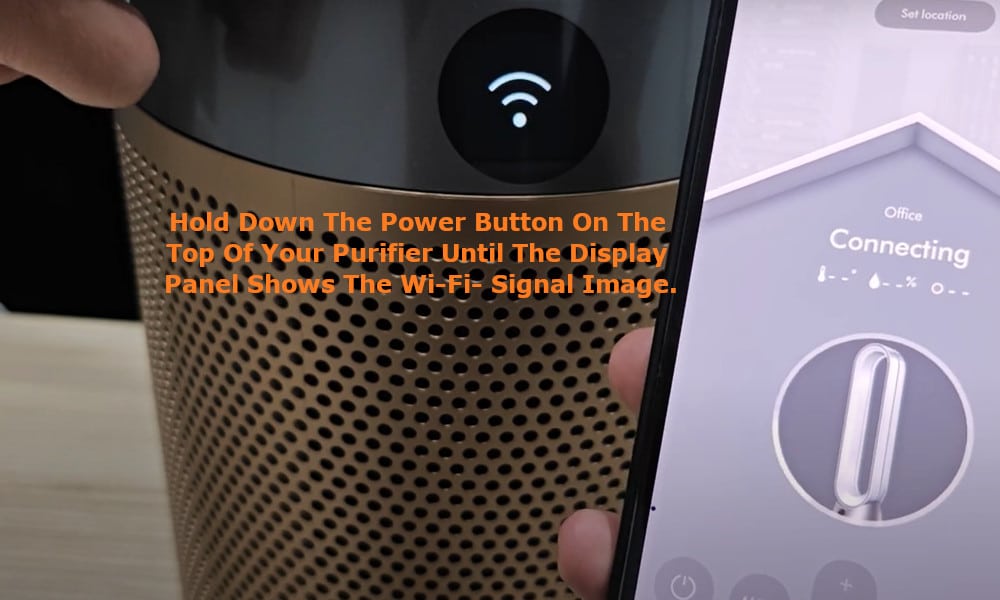
The app on your smart device should then inform you that it is connecting to the Wi-Fi. If your app comes up with a message telling you that “There appears to be a problem connecting your machine” then you should click on the refresh symbol.
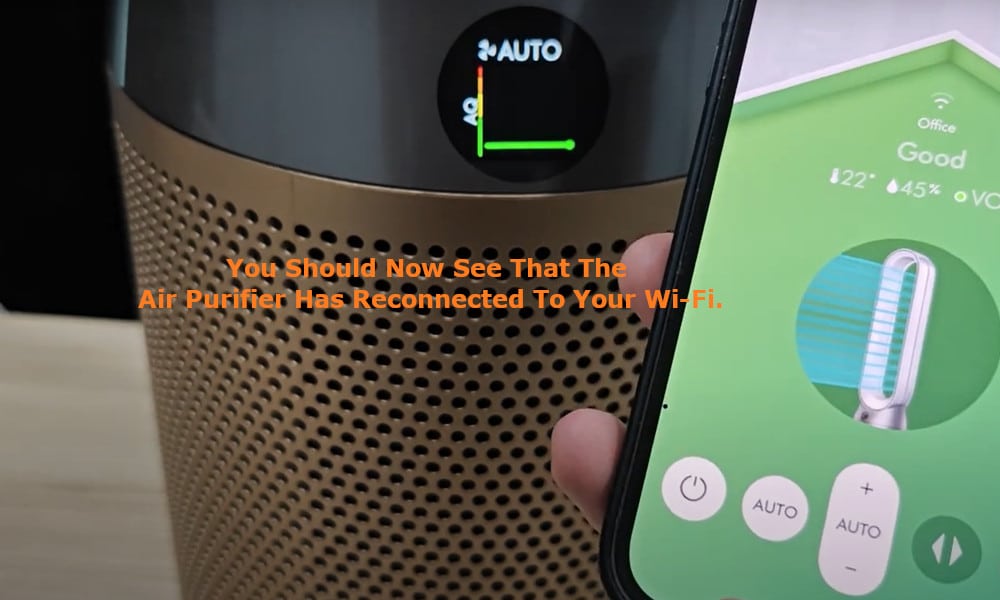
This will take you to the main display screen on the app, and you should now see that the Air Purifier has reconnected to your Wi-Fi and is functioning properly once again.
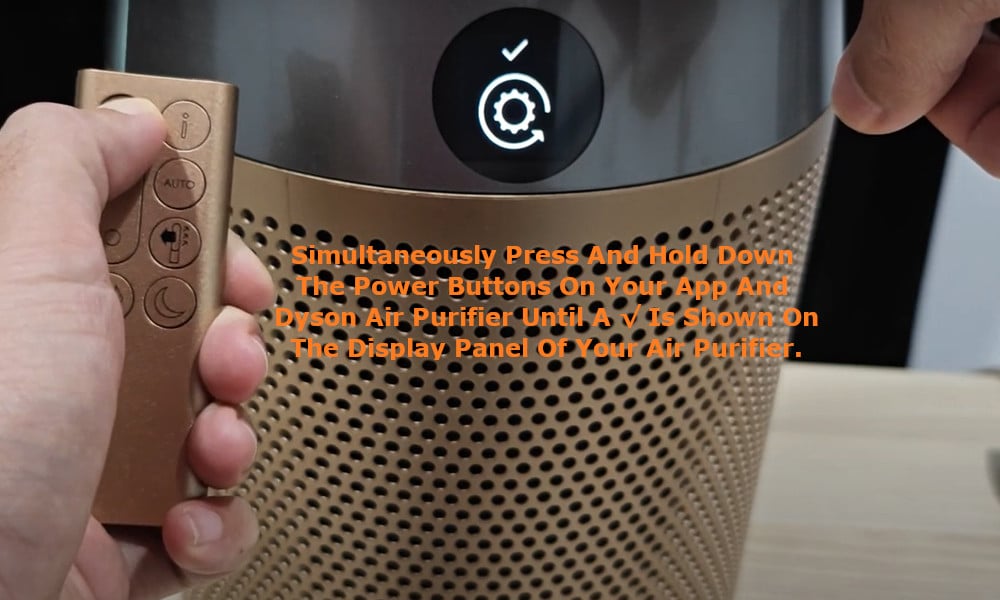
The second method that you can try is to setup the Dyson app again. To do this, on your app scroll down to the ‘Remove machine’ option and remove your machine. A message confirming that your machine has been removed will be displayed.
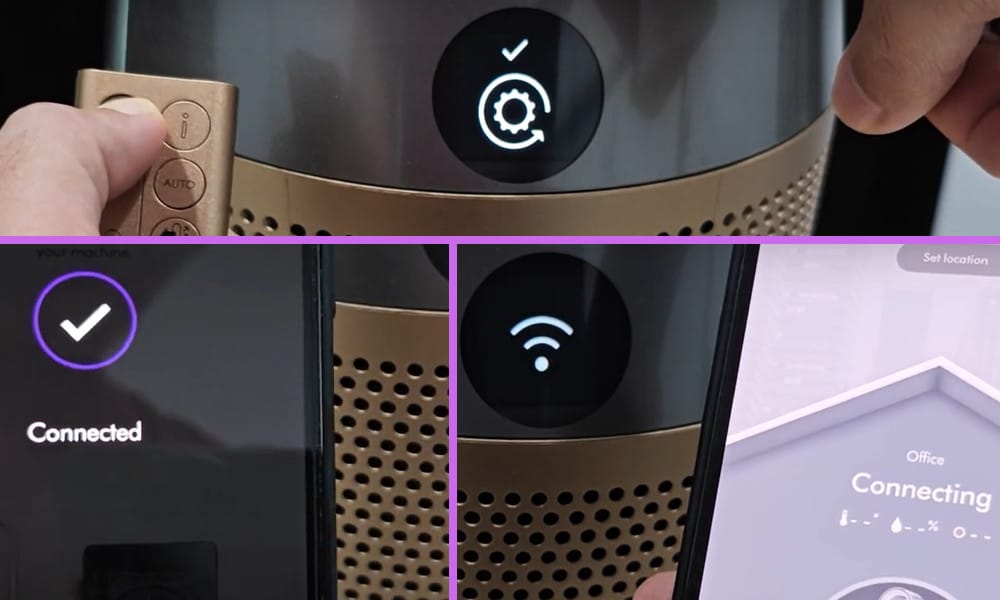
Click on the ‘OK’ option. Next you need you will need to simultaneously press and hold down the power buttons on both your app and on the Dyson Air Purifier until a √ is shown on the display panel of your Air Purifier.
Now you need to use your Dyson app and select the ‘Add machine’ option. You should see your Dyson Air Purifier displayed and be able to select it.
A message advising you to “Hold your device next to the machine’s display” will be displayed. Holding your device close to the Air Purifier, the display on the Purifier will show that your device is close enough, and the app on your device will advise you to “Now, press the power button on your machine”.
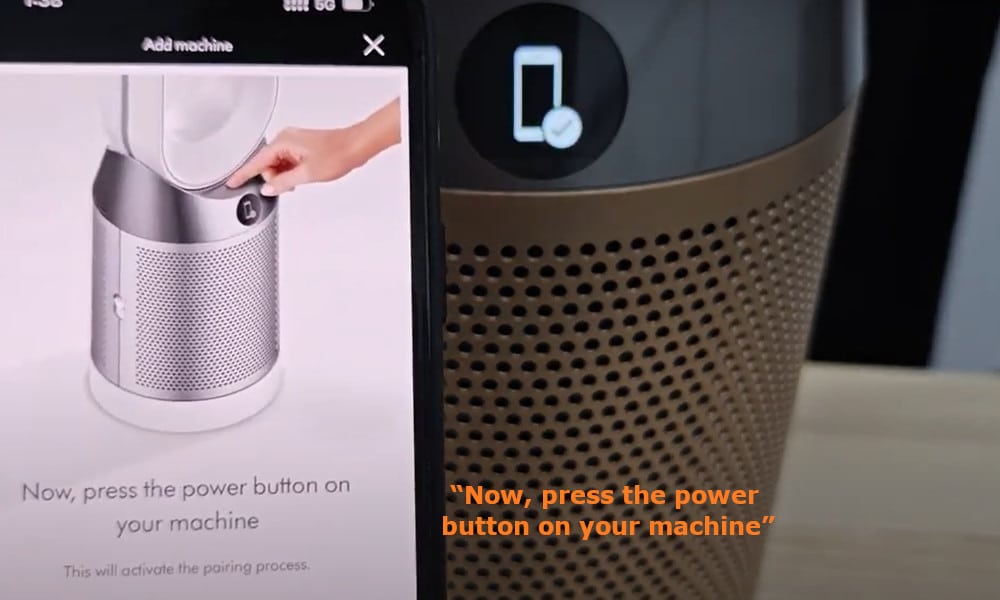
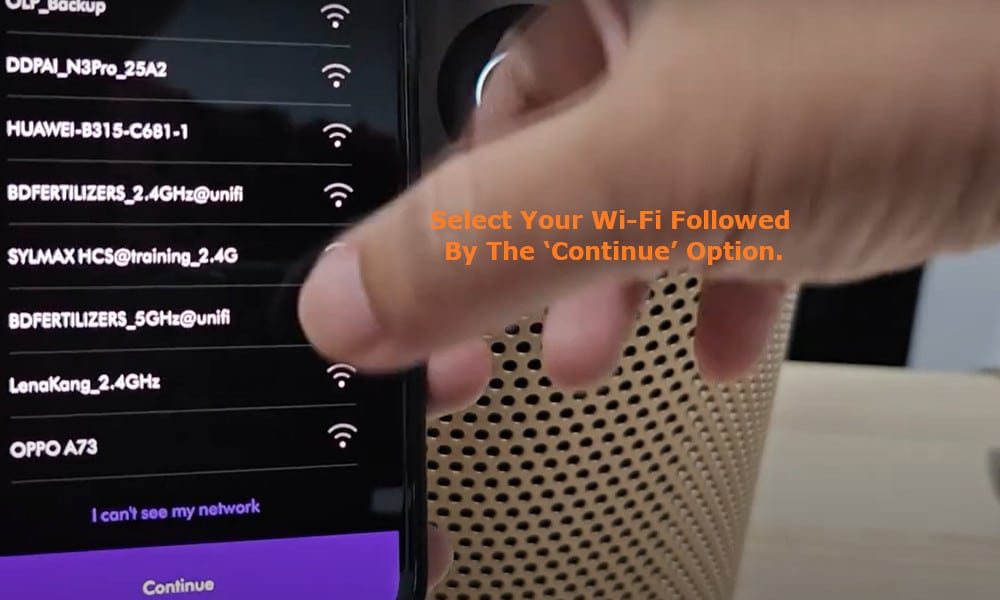
Press the power button on your Air Purifier and your device will confirm that you have done this and that it is pairing with your machine. At the bottom of the screen of your device you will now be able to select ‘Continue setup’ and you will be taken to the screen showing the available Wi-Fis.
Select your Wi-Fi followed by the ‘Continue’ option. This then takes you to the password screen where you need to enter the Wi-Fi- password if you are using one.
Press the ‘Submit’ option and the ‘Confirming connection’ screen will be displayed together with a notification that it will take a moment for the connection to be made.
As the connection is being made you will be able to see the progress as each of the four circles at the top of the screen will progressively be shown with a √ and light up.
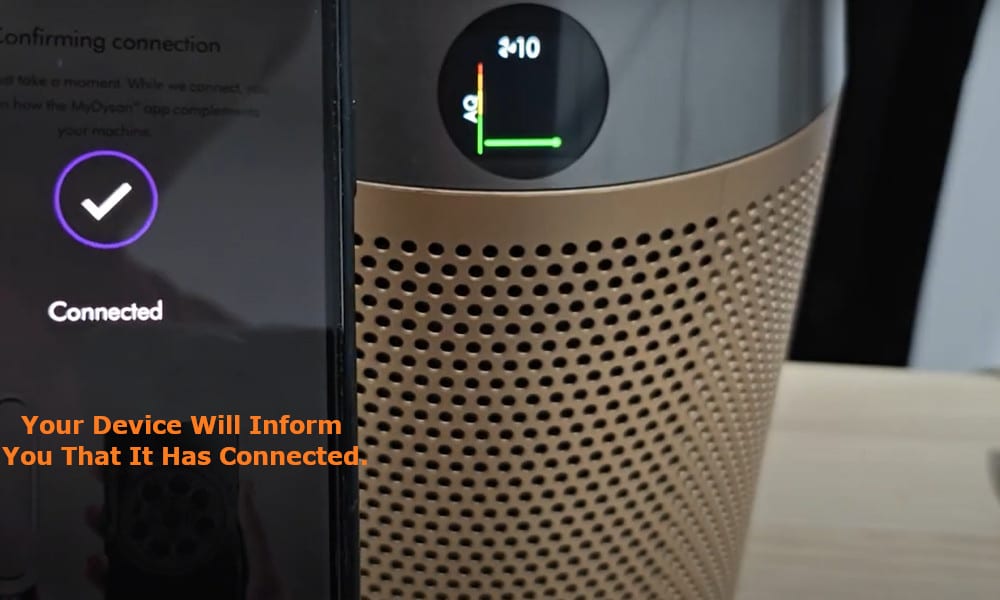
Once the connection has been established, your device will inform you that it has connected and you can then select the room in which your device is located.
Once you have confirmed the room, select the ‘Done’ option and in the screen asking you “When did you purchase your machine” simply input the date and press ‘OK’ followed by ‘Confirm’ and ‘OK, get started’.
Your Air Purifier has now been reconnected to your Wi-Fi and should again work perfectly.