LED Strip Light Driver Calculator
Size a constant-voltage LED strip driver from real strip watts, total length, voltage, current, wire gauge, round-trip voltage drop, power injection, and dimmer load.
Driver sizing result
Calculated from full strip watts, selected headroom, wire drop, and dimmer limit.
Low-current cabinet, shelf, toe-kick, and path accent strips; usually easy to power from one end.
Common task-lighting load; 12 V works for short sections, while 24 V handles longer room runs better.
High-density under-cabinet and cove use; expect driver headroom and power injection on long runs.
All channels on can draw much more than scenes suggest; driver sizing should use maximum rated watts.
Bright continuous-light strips need larger drivers, heavier feed wire, and shorter injection spacing.
Good for cabinet zones and small accent loops; current doubles compared with 24 V at the same watts.
Best default for cove, hallway, and garage runs because lower current reduces voltage-drop pressure.
PWM dimming reduces average load, but conductors and drivers still need to tolerate peak strip demand.
| Strip rating | Watts per foot | Typical voltage | Best use |
|---|---|---|---|
| 4.8 W/m | 1.46 W/ft | 12 V or 24 V | Accent shelves, toe kicks, display outlines |
| 9.6 W/m | 2.93 W/ft | 12 V or 24 V | Cabinet task light and small cove runs |
| 14.4 W/m | 4.39 W/ft | 24 V preferred | Bright counters, work benches, room coves |
| 19.2 W/m | 5.85 W/ft | 24 V preferred | RGBW walls and high-output feature lighting |
| 28.8 W/m | 8.78 W/ft | 24 V or 48 V | COB high-output linear light |
| Wire gauge | Ohms per 1000 ft | Drop pressure | Common LED feed use |
|---|---|---|---|
| 22 AWG copper | 16.14 | High | Short pigtails, sensor leads, very low-current strips |
| 20 AWG copper | 10.15 | Medium high | Short cabinet feeds and low-power accent strips |
| 18 AWG copper | 6.385 | Medium | Common cabinet and shelf LED feed wire |
| 16 AWG copper | 4.016 | Low | Longer room feeds and brighter 24 V strips |
| 14 AWG copper | 2.525 | Lower | Higher-current home-run feeds to zones |
| 12 AWG copper | 1.588 | Lowest | Long home runs, high load, or distribution trunk feeds |
| Voltage | Current at 120 W | Typical max strip section | Driver note |
|---|---|---|---|
| 5 V | 24.0 A | 3 to 10 ft | Best for pixels, frequent injection required |
| 12 V | 10.0 A | 16 to 20 ft | Good for short cabinets and small rooms |
| 24 V | 5.0 A | 30 to 40 ft | Best all-around voltage for room-length strips |
| 48 V | 2.5 A | 60 ft plus | Useful for long architectural strip systems |
| Driver type | Output behavior | Use with LED strip | Check before sizing |
|---|---|---|---|
| Constant voltage | Fixed 5, 12, 24, or 48 V | Most flexible LED strip tape | Match strip voltage and exceed calculated watts |
| Constant current | Fixed mA current range | LED modules, not most strip tape | Needs LED current and voltage range match |
| PWM dimmable CV | Voltage pulses at strip voltage | Most smart controllers and dimmers | Controller amp rating per channel |
| Triac or ELV dimmable | AC side dimming into driver | Wall-dimmer strip installs | Minimum load and compatible dimmer list |
| Project | Typical length | Common strip | Typical driver class |
|---|---|---|---|
| Under-cabinet counter run | 12 to 18 ft | 12 V 9.6 W/m | 60 W to 75 W |
| Room cove lighting | 35 to 70 ft | 24 V 9.6 to 14.4 W/m | 150 W to 320 W |
| Display shelf group | 20 to 40 ft | 12 V 4.8 to 9.6 W/m | 60 W to 150 W |
| Garage bench lighting | 16 to 30 ft | 24 V 14.4 W/m | 120 W to 180 W |
| RGBW media wall | 20 to 50 ft | 24 V 19.2 W/m | 180 W to 400 W |
When you are planning to install LED strip lighting in your kitchen, hallway, or media wall, you must calculate the power requirements and the correct size of an LED strip driver. You need to ensure that the driver you choose for your LED strip lighting work properly after the installation. If you size the driver incorrectly, the LED strip lighting might dim at the far end of the run.
The calculator on this page will calculate for you the power requirements and the driver size. You must enter the type of LED strip lighting, the length of the installation, the voltage of the LED strip lighting, the gauge of the wire that you will use, and the method for feeding the power to the LED strip lighting. The calculator will add headroom to the total wattage requirement so that the LED strip lighting driver dont run at maximum power all of the time.
How to Choose the Right Driver and Wire for LED Strip Lights
Additionally, the calculator will show you the resulting wattage, current, and voltage drop that will occur along the power feed wire. You might be surprised at how the calculator change your estimate for the size of the driver that you’ll use. The voltage of the LED strip lighting has a major impact on the power requirements for the LED strip lighting installation.
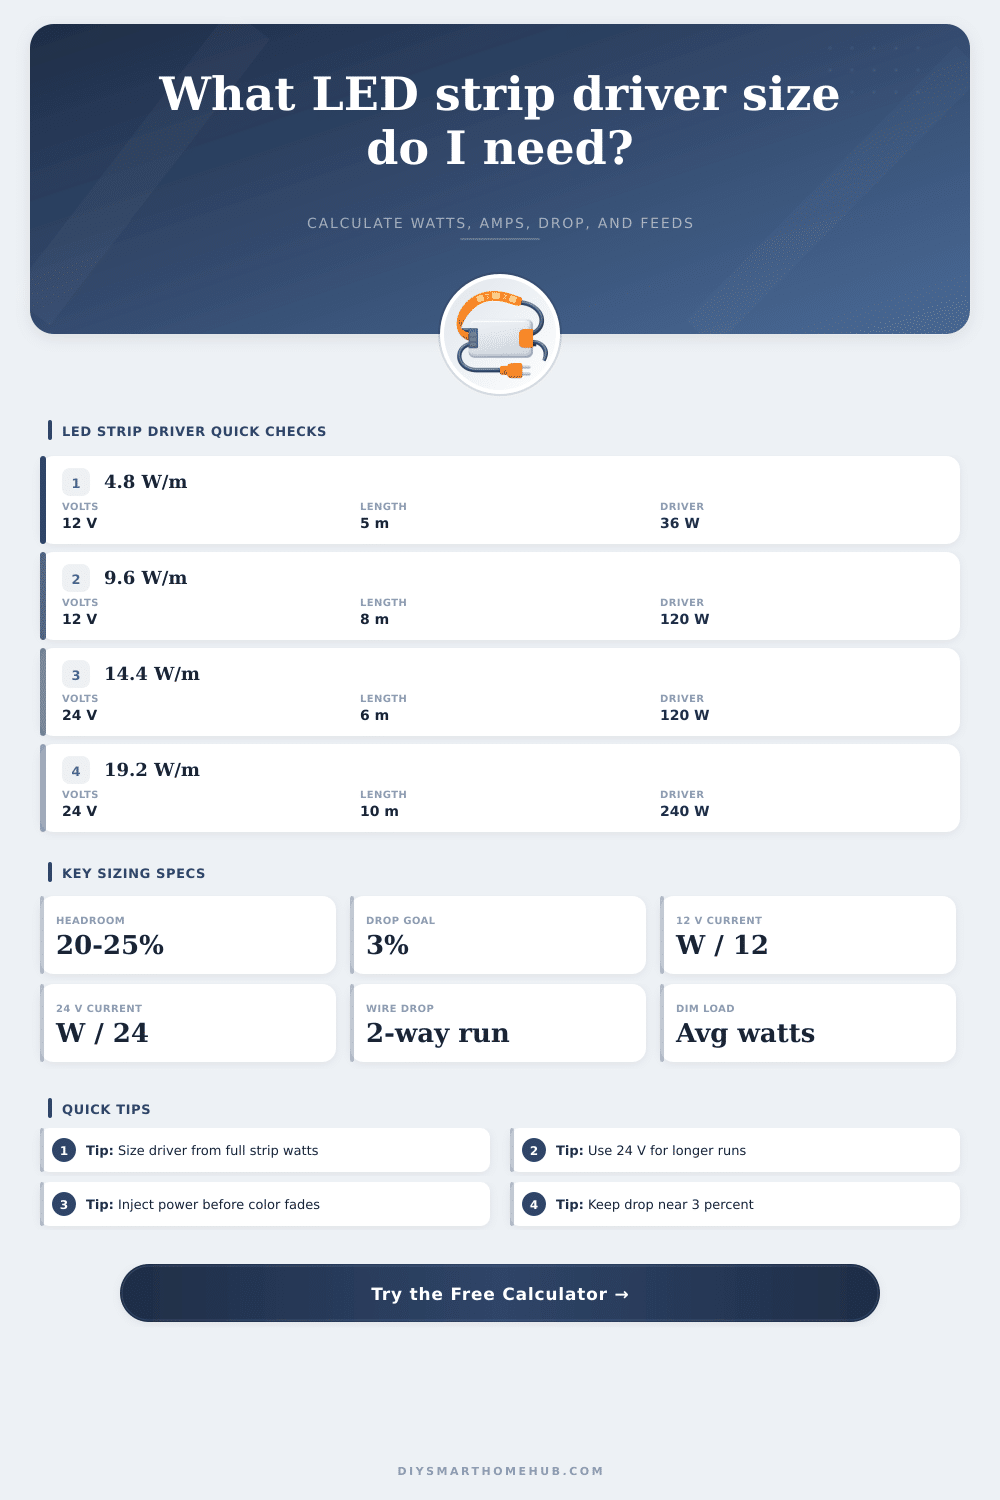
A 12-volt LED strip lighting will draw twice the current than a 24-volt LED strip lighting of the same wattage. The higher the current draw of the LED strip lighting, the more greater the voltage drop along the power feed wire. For this reason, longer architectural runs will perform better with 24-volt LED strip lighting.
The calculator will allow you to change the voltage setting for the LED strip lighting to see how this changes the current and the voltage drop along the power feed wire. Power injection is one method of providing power to LED strip lighting installations. Power injection can be necessary for LED strip lighting installations because the intuition of the human mind often fails in these situations.
If there is only one power injection point for the LED strip lighting installation, this is appropriate for installing LED strip lighting in short cabinets. For installations of LED strip lighting that are longer than 20 feet, however, a single power injection point will not be sufficient. The copper traces within the LED strip lighting will create dimming of the LED strip lighting if the length of the installation exceed 20 feet.
To avoid this dimming, you must add a second power injection point to the LED strip lighting at the far end of the installation or in the middle of the installation. The calculator will provide an estimate of the number of power injection points that will be required for your LED strip lighting installation of a certain length and power density. The gauge of the wire that will power the LED strip lighting installation is another factor that will impact your installation.
A larger gauge wire will reduce the voltage drop along the power feed wire. The problem with using a larger gauge wire is that it will cost more and it will be more difficultly to hide the wire behind drywall. The LED strip lighting calculator will allow you to experiment with different wire gauges for your installation.
For instance, you can use the calculator to decide whether changing from 18 AWG to 16 AWG wire will provide enough margin in your installation to avoid adding an extra power injection point for your LED strip lighting. For many rooms in a residence, changing the gauge of the wire will be all that is required to keep the voltage drop to less than three percent of the supplied voltage. The dimming function of LED strip lighting is a function that allows you to change the brightness of the LED strip lighting.
The driver and wiring for the LED strip lighting installation, however, must be sized to handle the full power load of the LED strip lighting. The dimmer controller might run the LED strip lighting at only fifty percent of its brightness, for example. The controller could still need all of the power from the driver if the scene in the house change.
The LED strip lighting calculator will account for any limits on brightness of your dimmer switch. The calculator will show you the wattage requirements of the LED strip lighting if it runs at full brightness and the average load on the driver if the dimmer is used. This allows you to understand what the LED strip lighting installation is capable to doing.
The conditions of real projects often differ from those listed on the specification sheets of LED strip lighting products. The ambient temperature of the installation site, the resistance of the electrical connectors, and the output of the LED strip lighting can all change from the specifications that is listed in the product descriptions. These factors will require a higher level of power for the LED strip lighting installation than is listed on the specification sheets.
To accommodate these factors, the LED strip lighting calculator includes a headroom setting for power requirements. Adding between twenty and twenty-five percent to the total power requirements of the LED strip lighting installation will provide the driver with some breathing room. Additionally, adding twenty to twenty-five percent to the total power requirements will allow you to avoid spending too much money on an LED strip lighting driver that is too large for the installation.
The overall goal of using the LED strip lighting calculator is to ensure that the LED strip lighting looks the same from one end of the installation to the other. You want to make certain that the LED strip lighting will continue to work after the installation of the LED strip lighting and after the drywall is hung on the walls. Once you have used the LED strip lighting calculator to determine the size of the driver, the gauge of the power feed wire, and the number of power injection points that will be required for your installation, the installation of the LED strip lighting becomes a matter of execution of the plans that you have made.