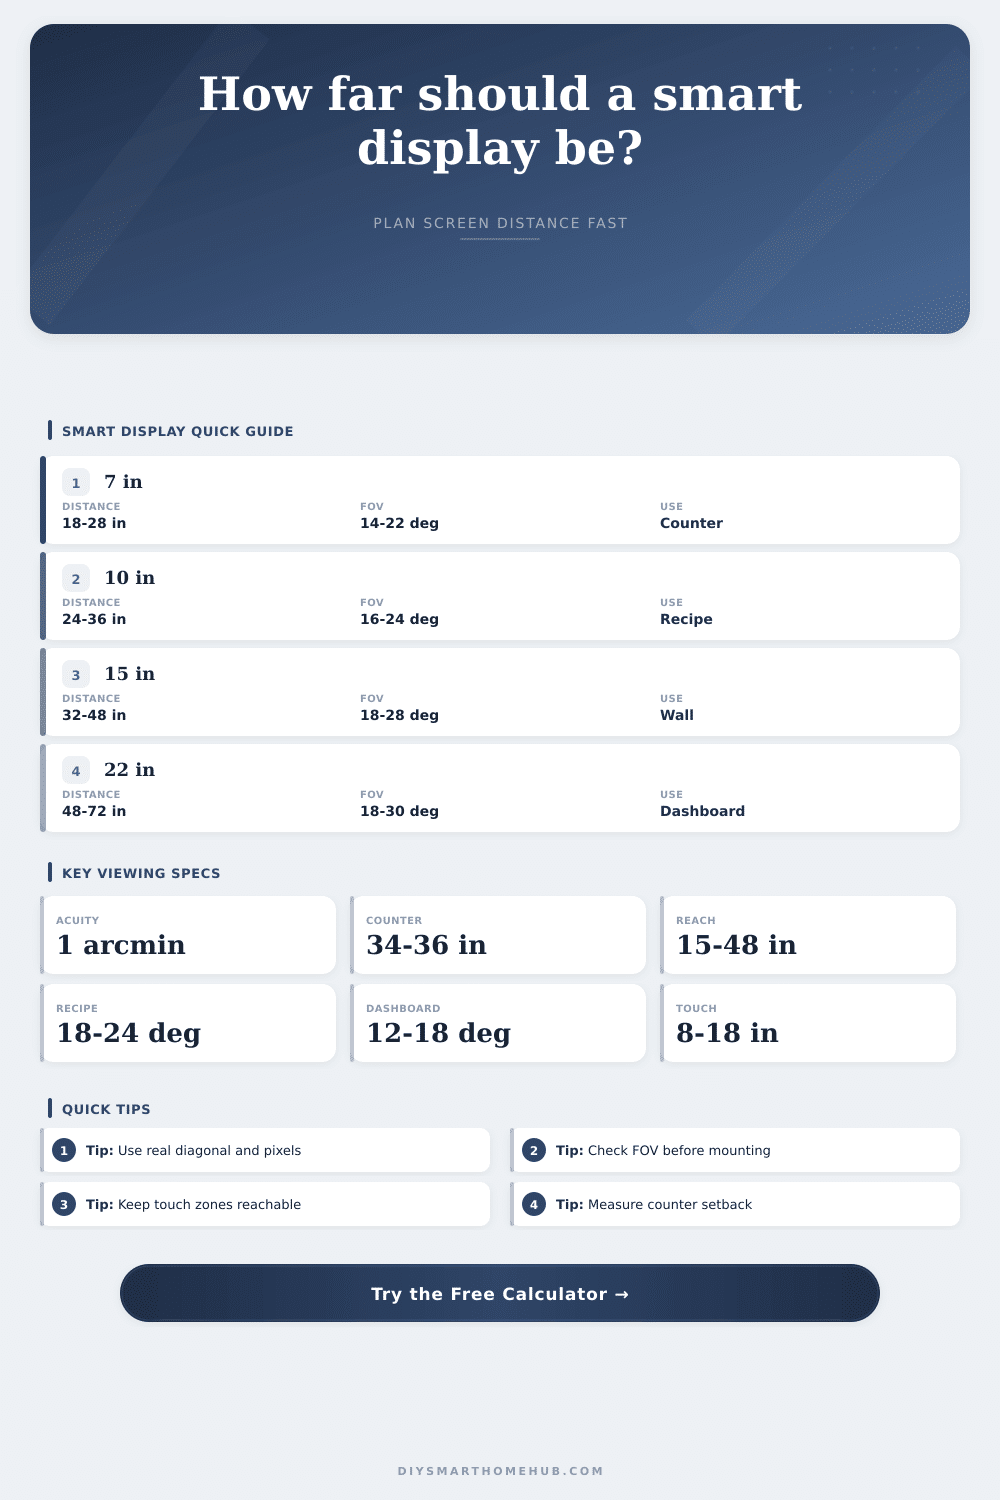
Smart Display Viewing Distance Calculator
Estimate screen width from diagonal size, match viewing distance to field of view, check PPI against visual acuity, and test kitchen counter height plus touch reach before placing a smart display.
Formula breakdown
| Display class | Typical ratio | Approx active width | 20 deg distance | Best viewing role |
|---|---|---|---|---|
| 7 inch compact panel | 16:10 | 5.9 in / 15 cm | 16.7 in / 42 cm | Short counter controls and quick status |
| 8 inch smart display | 16:10 | 6.8 in / 17 cm | 19.4 in / 49 cm | Touch-friendly kitchen or entry panel |
| 10.1 inch recipe display | 16:10 | 8.6 in / 22 cm | 24.5 in / 62 cm | Recipe reading and smart home controls |
| 12.9 inch wall tablet | 4:3 | 10.3 in / 26 cm | 29.2 in / 74 cm | Wall-mounted family dashboard |
| 15.6 inch dashboard | 16:9 | 13.6 in / 35 cm | 38.5 in / 98 cm | Room display with camera preview tiles |
| 21.5 inch wall display | 16:9 | 18.7 in / 48 cm | 53.1 in / 135 cm | Across-room glance and shared status board |
| Viewing role | Target HFOV | Acuity check | Typical distance | Planning note |
|---|---|---|---|---|
| Quick status glance | 10 to 16 deg | 20/30 ok | 36 to 72 in | Good for time, weather, switches, and large text. |
| Recipe reading | 18 to 24 deg | 20/20 target | 22 to 40 in | Comfortable for a countertop display while preparing food. |
| Camera preview detail | 24 to 32 deg | 20/20 or sharper | 18 to 36 in | Use higher FOV only when the display remains within reach. |
| Family dashboard | 14 to 22 deg | 20/25 ok | 32 to 60 in | Balances shared visibility with less visual dominance. |
| Touch-first panel | 20 to 30 deg | 20/20 target | 16 to 32 in | Place controls inside the reachable screen band. |
| Calculation | Formula | Inputs | Output meaning |
|---|---|---|---|
| Screen width | diagonal x aspect width / sqrt(width ratio^2 + height ratio^2) | Diagonal, aspect ratio | Physical active screen width used for FOV. |
| Screen height | diagonal x aspect height / sqrt(width ratio^2 + height ratio^2) | Diagonal, aspect ratio | Physical active screen height used for placement. |
| Pixel density | sqrt(pixel width^2 + pixel height^2) / diagonal inches | Resolution, diagonal | Pixels per inch for acuity and pixel pitch. |
| FOV angle | 2 x atan(screen width / (2 x viewing distance)) | Width, distance | Horizontal field of view at the user's eyes. |
| Target distance | screen width / (2 x tan(target FOV / 2)) | Width, target FOV | Viewing distance needed for the selected screen size. |
| Visual acuity distance | pixel pitch / tan(arc minutes / 60 deg) | PPI, acuity threshold | Distance where one pixel subtends the selected acuity angle. |
| Reference item | Common range | Metric equivalent | How this calculator uses it | What to check |
|---|---|---|---|---|
| Standard work counter | About 36 in | About 91 cm | Default counter or base height. | Bottom screen clearance and touch height. |
| Accessible work surface | 28 to 36 in | 71 to 91 cm | Reference band for lower counters. | Use actual local requirements for final design. |
| Unobstructed reach height | 15 to 48 in | 38 to 122 cm | Optional low and high touch limits. | Screen top should not exceed high reach if touch matters. |
| Counter setback | 8 to 18 in | 20 to 46 cm | Horizontal reach from counter edge. | Compare setback with comfortable arm reach. |
| Comfortable vertical angle | -10 to +10 deg | Same angle | Screen center compared with eye height. | Large up or down angles may feel awkward. |
| Scenario | Display | Distance | Actual HFOV | PPI | Reach result |
|---|---|---|---|---|---|
| Recipe screen | 10.1 in | 30 in | 16.3 deg | 224 ppi | 100% height |
Imagine: its meal time and you’re holding a recipe card, deeeelicious, though with some exact timing required. Your smart display are resting on kitchen counter a little bit out of reach, because you put it down without thinking about placement. To see the timer, you bend at the waist. Then you stretch over a pile of cut-up veggie and press the screen. Ugh. That was awkward.
Before we drill anything, let’s avoid that sort of friction by doing some good planning. Too frequently, we approach our screens as if they were magic rectangles capable of functioning as long as they has a power cord and internet connection. But they’re physical things that takes up space, which must be used from a certain angle or else they become more of an ergonomic problem then a useful helper.
How to Place Your Smart Display in the Kitchen
There is three competing factors in screen placement. What does your arm reach comfortabley? What do your eyes sees? And then, what can you actualy see? First up is visual acuity. If the pixels are too big compared to distance from your face they’ll appear blurry and jagged. This isn’t purely about pixel count. If you have a tiny but super-high-res screen that is far enough to make the dots visible, it won’t look good either. The dots will appear as blocks of color instead of smooth gradients.
So the first filter is visual acuity: How sharp do your eyes need to be to not notice any blurriness at a given distance from your face? That’s what the calculator up there uses to find the closest distance you can be without seeing any blur, based off your eyesight. Is it 20/15 sharpness? Or can you get away with something looser like 20/30 when you’re just checking the weather while making coffee?)
The second… And likely most significant factor in overall satisfaction, is field of view, which is simply how much of your peripheral vision the screen capture. If you are viewing a small display from three feet away, it will occupy just a sliver of your visual field and feel cramped; you’ll end up squinting at tiny buttons. On the other hand, if you are looking at a huge wall monitor from two feet away, it will be overwhelming and cause eye strain as you continually shift focus. Ideally, we want around eighteen to twenty-four degrees horizontally when reading detailed instructions like recipes, since this range feel natural and doesn’t require much head movement. To work this out, the calculator asks you what distance you’d ideally have the screen positioned at and tells you whether that distance would accommodate your desired screen size comfortable.
And then there’s the reach factor, something people often forget about until late in the day when their arms is sore from making dinner and their back hurt after stretching for the last button push. Standard counter heights are roughly three feet, or thirty-six inches. However, your eye level is above this. Looking at a screen that puts the center too far up will make you crane your neck, a posture that tax your neck muscles over time. Looking down too much causes hunching.
The tool adjust for your eye height and touch pivot points to position the interactive parts of the screen within a comfortable vertical range. It also takes into account horizontal setback, a screen pushed way back against the backsplash makes you lean forward more. That means creating dead zones where you can’t reach comfortably with your arm unless you’re leaning precariously over a hot burner or shifting your body weight.
It’s not like a real kitchen is ever tidy: There’s clutter, there’s grease, there’s steam. You can’t measure for a display in an empty room. Think about how you move around day-to-day. Where do you stand when you’re stirring a pot? Where do you cut vegetables? The display need to be easily within view of these tasks, just beyond whatever area is most active.
That fifteen-inch dashboard may sound great on paper. However, if it requires you to turn your body away from the stove just to see a video call, it has failed its mission. Utility trumps size. Context is everything. The installation is designed more like a workstation than a wall decoration, which is why interaction should of being within comfortable arm’s reach and content should be sized appropriately for the space.
To get an idea where things might sit in your own room, look at the reference table on the page, and scale according to your room’s real-life measurements. Find the sweet spot between what’s comfortable and what’s clear so that technology enhances your cooking instead of detracting from it. Then you’ll forget about the screen entirely and focus on the food.
That is a good placement.