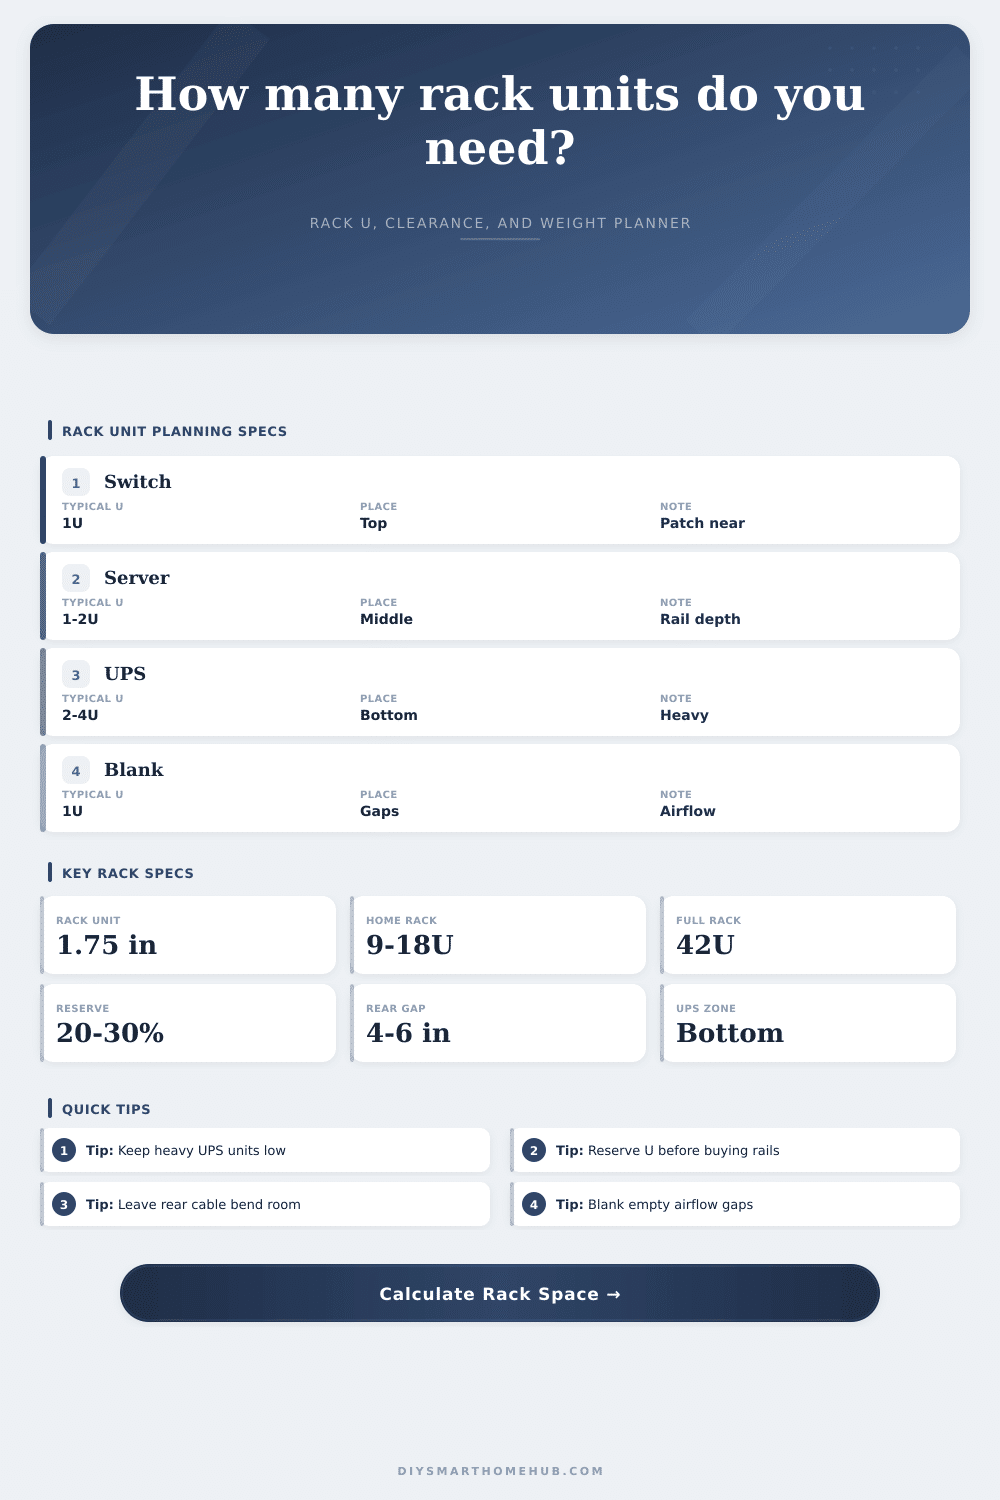
Server Rack Unit Space Calculator
Plan rack U usage from servers, network devices, patch panels, blanking panels, cable managers, UPS units, and growth reserve while checking rack height, depth clearance, and weight distribution.
Also shown in centimeters for metric planning.
Reserve is counted as intentionally occupied planning space.
Negative slack means rear connectors may not fit cleanly.
The calculator estimates bottom, middle, and top shares.
Common device U requirements
| Device type | Typical U | Typical depth | Placement note |
|---|---|---|---|
| Patch panel | 1U | 2-4 in | Near switches and cable managers. |
| 24/48-port switch | 1U | 8-16 in | Upper third for patching access. |
| Firewall or router | 1U | 8-14 in | Near WAN and switch connections. |
| NVR or short server | 1U-2U | 14-22 in | Check rail and rear cable depth. |
| Storage server | 2U-4U | 20-30 in | Heavy enough for lower placement. |
| Rack UPS | 2U-4U | 16-28 in | Place at the bottom for stability. |
Rack size and height guide
| Rack size | Rack height | Typical role | Planning caution |
|---|---|---|---|
| 6U | 10.5 in / 26.7 cm | Small wall network rack | Reserve is very limited. |
| 9U | 15.8 in / 40.0 cm | Network plus small UPS | Depth usually matters more than height. |
| 12U | 21.0 in / 53.3 cm | Starter home lab rack | Plan blank panels and cable managers. |
| 18U | 31.5 in / 80.0 cm | Smart home closet rack | Good balance of growth and size. |
| 27U | 47.3 in / 120.0 cm | Lab or media rack | Anchor and load rating become important. |
| 42U | 73.5 in / 186.7 cm | Full-height equipment rack | Use vertical zoning for weight. |
Clearance and depth checks
| Check | Formula or target | Good signal | Watch signal |
|---|---|---|---|
| Rear internal slack | Rack depth - device depth - cable allowance | 4 in or more | Under 2 in |
| Front service space | User clearance input | 30 in or more | Under 24 in |
| Rear service space | User clearance input | 24 in or more | Under 18 in |
| Cable bend allowance | Rear cable allowance | 4-6 in | Under 3 in |
| Rail fit | Device depth inside usable rack depth | Positive slack | Negative slack |
Preset comparison table
| Preset | Rack U | Used U | Remaining | Balance |
|---|
How many switches can fit in my server rack? That’s the sort of panic you get when you have no room left for another device on your home server, but need to add a switch. Tangled messes start as dreams of having unlimited space. Choose the wrong gear and it won’t matter how much planning goes into your system; you’ll still struggle to cram everything inside your rack and shut the doors.
Planning your vertical space matters more than picking the right gear, though. Once you put in the number of devices you’re planning to install, the calculator does the rest of work for you. You won’t have to guess when converting between inches and meters or feet. Your messy list of equipment becomes a neat little number showing whether or not what you planned is even physicaly possible.
How to Plan Your Server Rack Space
A single rack unit (U) is exactly 1.75 inches, the most basic measure in data center construction. That may sound like a very small space, but it adds up fast. You will need space for your switches and maybe some servers, but that is usually much less then the total space you actualy need. Other pieces of equipment such as patch panels, blanking panels, UPS rails and even horizontal cable managers takes up space too. Just remember, if you don’t plan for a cable manager, you’re going to have a bunch of cables hanging from the front of your switches.
The key is knowing what you are realy measuring. Servers aren’t the only thing you count; everything between rails is counted, including inches of metal.
In rack planning, depth is a silent killer. Just because there’s lots of vertical space doesn’t mean the rack isn’t a failure. If combination of the deepest device and rear cable bend allowance exceeds the usable rack depth, it won’t work. Most folks think “I’ll just measure my server chassis and see if it fits.” That ignores the fact that devices also require some rear cable slack for network ports, USB connections, and power cables. Putting a 20 inch server in a 24 inch rack with only a few inches of back clearance won’t close the door. Worse, it might close but break connectors by crushing cables or create heat traps for poor air flow. The reference table makes it clear how much rear slack matters.
Another thing that is often overlooked until later is weight distribution. Dense storage drives and heavy UPS batteries belongs in the lowest part of the rack (i.e., bottom). Why? Keeping the center of gravity low makes the rack more stable and easier to service. Stacking a heavy UPS on top of the rack is a recipe for disaster: it’s hard to reach around heavy equipment when swapping cables or drives; and it creates a tipping hazard. The share calculation shows estimated bottom, middle, and top shares so you can visualize the balance. It is a simple physics problem, but it would of been an expensive use of your time and effort if done incorrectly.
The idea of growth reserve, leaving some room (twenty to thirty percent) in your racks for future gear, is what makes this a permanent infrastructure rather than a temporary fix. By reserving this space, you don’t have to worry about pulling airflow blanks when installing new servers, shelves, or switches.
Airflow is critical in a small space. Because hot air rises, you don’t want to be blocking its path with blanking panels. That just traps the heat. If you don’t put up blanking panels though, you’ve got a chimney effect that pulls the cold air out of the bottom before it can cool your equipment. Blanking panels cost very little but are excellent insurance against heat getting out of control.
There are several presets that serves as a decent starting point depending on your use case. For example, a full height rack takes some effort to zone properly, whereas a mini network shelf doesn’t take up much room at all. Are you constructing a smart home closet? Then you may want to focus on providing enough depth for PoE switches and NVRs. Do you have a virtualization lab? In this case, you’ll be concerned with weight capacity and vertical density. Ultimately, there’s no one-size-fits-all solution, just tradeoffs. What do you value most? Thermal efficiency? Future expandability? Easy access?
The math balances out, then comes the easy part. Putting it all together physically should be a breeze. Now you know what goes where. Now you have an idea of your cable slack requirements. Now you can avoid tipping over the rack. Plugging in the cables is more fun than planning this stuff, but avoiding the back breaking task of moving big gear around again makes it worth it. It turns a difficult build-out into a predictable process. Leave enough breathing room so it can also grow while looking just as good as it does performing. Plan for empty space first and the rest follows suit.