Rack Cooling Airflow Calculator
Estimate rack heat, required CFM, derated fan capacity, N+ redundancy margin, room air changes, and hot aisle temperature rise.
🎛Named rack presets
📊Rack heat and airflow inputs
⚙Formula reference grid
📐Reference tables
| Cooling check | Formula | What it tells you | Use when |
|---|---|---|---|
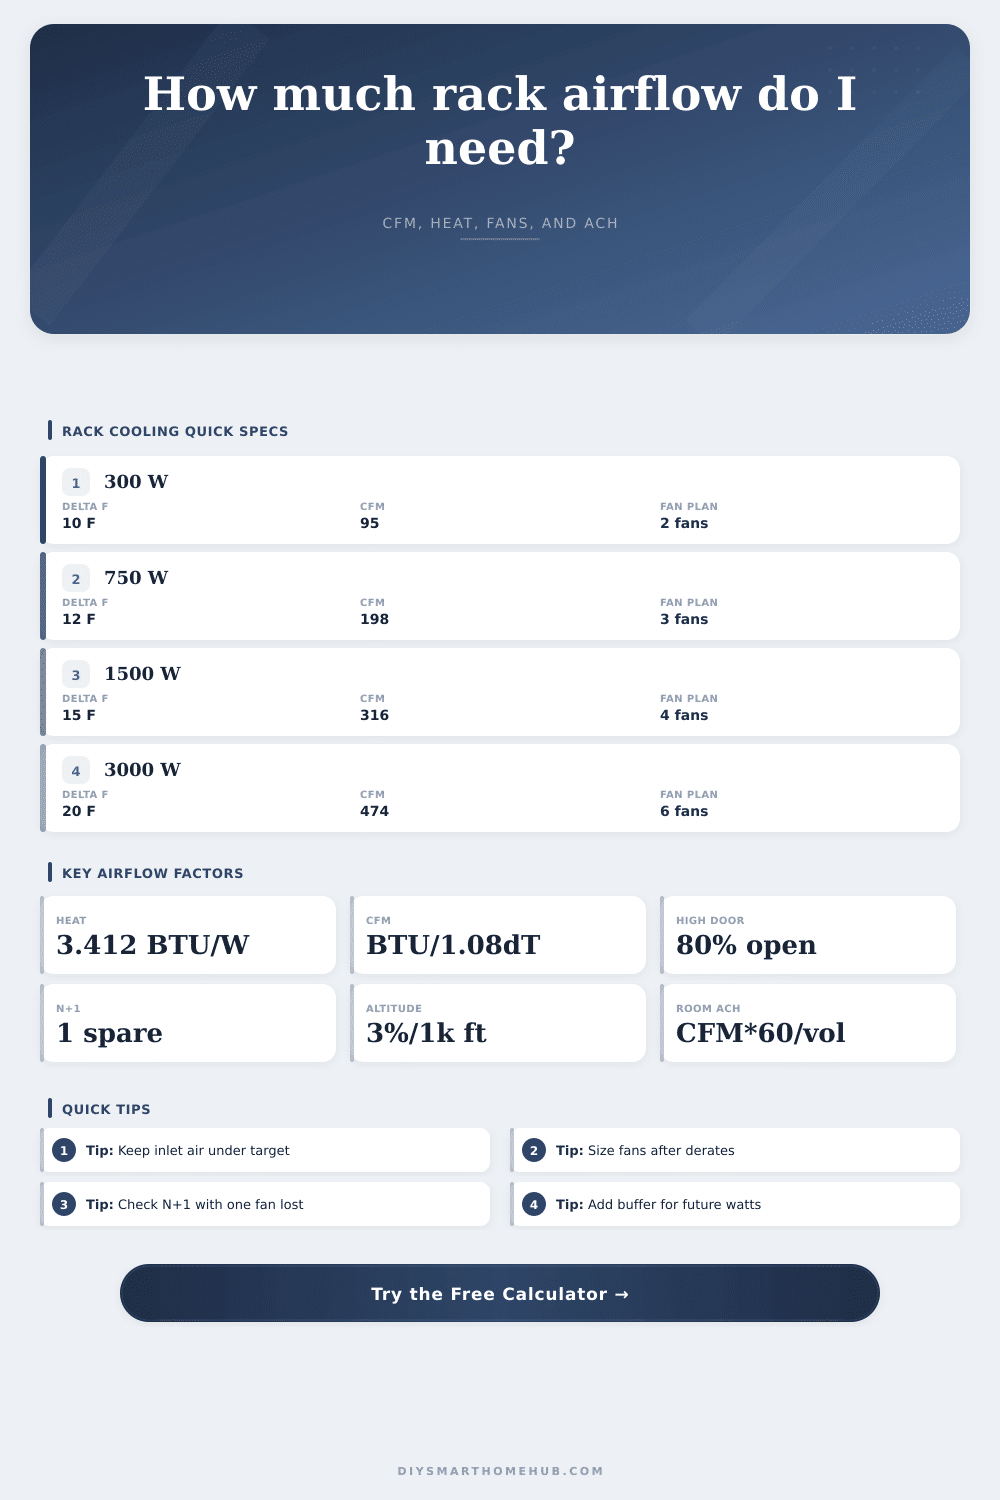
| Heat output | BTU/hr = watts × 3.412 | Electrical load converted to heat | Every rack airflow estimate |
| Required rack CFM | CFM = BTU/hr / (1.08 × allowed ΔT) | Airflow needed through the rack | Fan sizing and panel planning |
| Room ACH CFM | CFM = room ft³ × ACH / 60 | Room exhaust flow for air changes | Closets and small equipment rooms |
| Hot aisle rise | ΔT = BTU/hr / (1.08 × actual CFM) | Predicted exhaust temperature rise | Checking hot aisle comfort margin |
| Door open area | Typical derate | Airflow meaning | Planning note |
|---|---|---|---|
| 80% to 100% | 1.00x | High-flow perforation | Usually suitable for dense racks |
| 64% to 79% | 0.80x to 0.99x | Moderate restriction | Check fan margin after derate |
| 40% to 63% | 0.50x to 0.79x | Noticeable pressure loss | May need blanking panels or more fans |
| 20% to 39% | 0.25x to 0.49x | Restrictive door path | Improve door or use ducted exhaust |
| Altitude | Density factor | Approx derate | Cooling impact |
|---|---|---|---|
| 0 ft | 1.00x | 0% | Rated fan airflow basis |
| 2500 ft | 0.925x | 7.5% | Small capacity reduction |
| 5000 ft | 0.85x | 15% | Fan margin becomes important |
| 8000 ft | 0.76x | 24% | Use larger airflow allowance |
| Rack scenario | Watts | Allowed rise | Required CFM | Fan plan | Door open area |
|---|---|---|---|---|---|
| Network closet 12U | 650 W | 12°F | 171 CFM | 3 × 90 CFM, N+1 | 70% |
| Home lab 24U | 1400 W | 15°F | 295 CFM | 4 × 120 CFM, N+1 | 64% |
| NAS stack 24U | 1800 W | 18°F | 316 CFM | 5 × 110 CFM, N+1 | 80% |
| Dense compute 42U | 4200 W | 20°F | 663 CFM | 8 × 160 CFM, N+2 | 80% |
🔧Actionable airflow notes
Set up your home lab and grab some servers off the shelf. Build a rack and fill it up. Power everything on and everything look good. But then in about twenty minutes, you’ll hear your temperature alarms starting to chirp.
Your stuff isn’t broken. It’s just that there isn’t enough cooling. Every single watt of power your equipment use gets converted to heat. And that heat must leave the rack or else your components will bake from it.
How to Keep Your Home Lab Cool
Don’t get caught up by common pitfalls. Learn the physics so you can run the numbers yourself. First consider the heat load. Just knowing the power draw on your server isn’t sufficient. Labs grow, so account for some future upgrade buffer. A 15 percent cushion on inputs counts. If you size your fans based off only today’s load, you will soon need to buy new ones.
You need to convert watts to British thermal units (BTUs), which are the standard unit for heating and cooling work. Without this bridge you can’t directly compare electrical draw (in watts) than fan capacity (in cubic feet per minute).
Next comes airflow requirement. How much air do you have to move to allow for the permitted rise in temp? If you want to limit the temperature rise (smaller delta), then you need more air moving to displace equivalent amount of heat. There is a tradeoff. Want a cooler rack? Use faster, louder fans. OK with a warmer rack? Quiet, slow fans. The page has a clear reference table laying it out. As wattage density increases, you really must have a lot more CFM. That’s why you shouldn’t ignore that number.
Don’t forget the derates This is where most folks go wrong. That one-hundred-twenty-CFM-rated fan doesn’t blow one-hundred-twenty CFM into your closet. Why? Because of the door. Choking the airflow: solid doors and doors with low perforation will kill fan performance. The tool applies a derate factor.
At higher elevations, the air gets thinner. Fans moves less mass in thin air. Your fans work harder up high to do the same job. Under-provisioning cooling happens when folks ignore these things.
No redundancy = no compromise. One extra fan (n + 1) means you have one extra. Two fans = three fans. Three fans = four…you get the idea. When a fan dies it has someone to cover its ass. Your remaining fans will continue to provide required airflow even with one offline. How much margin do you have? A negative number = trouble. Today = good; tomorrow = bad. Plan for worst case.
The next layer is ventilation of the room. You’re exhausting hot air from your rack. That air must exit the room. Over time, in a sealed and small room, the ambient temperature will rise. The tool determines how many air changes per hour you need to keep the room cool. It takes normal size for a room into account. Tweak it if your server closet is realy small. A small space warms more quickly.
Last, there is hot aisle rise. That’s a measure of how warm the air coming off the rack will be. A high number means you’re pushing up to your thermal limits. Make sure that’s not happening. And keep it reasonable. Know the maximum intake temps for your gear. Stay way under that.
Airflow is not glamorous. Reliability is. Infrastructure is. Get it right on day one. Save yourself some headaches down the road. Your gear should of be quiet and run cool. And that begins with a path for the right amount of air.
Math is easy. Execution counts.