Layered Lighting Ratio Calculator
Calculate room area, lux target, ambient/task/accent lumen allocation, fixture counts, dimming levels, and normalized layer ratios for a balanced lighting plan.
Ambient layer
Task layer
Accent layer
| Space type | Typical lux target | Common ratio | Planning note |
|---|---|---|---|
| Hallway or circulation | 75 to 150 lux | 80 / 10 / 10 | Ambient-heavy layout with low task demand. |
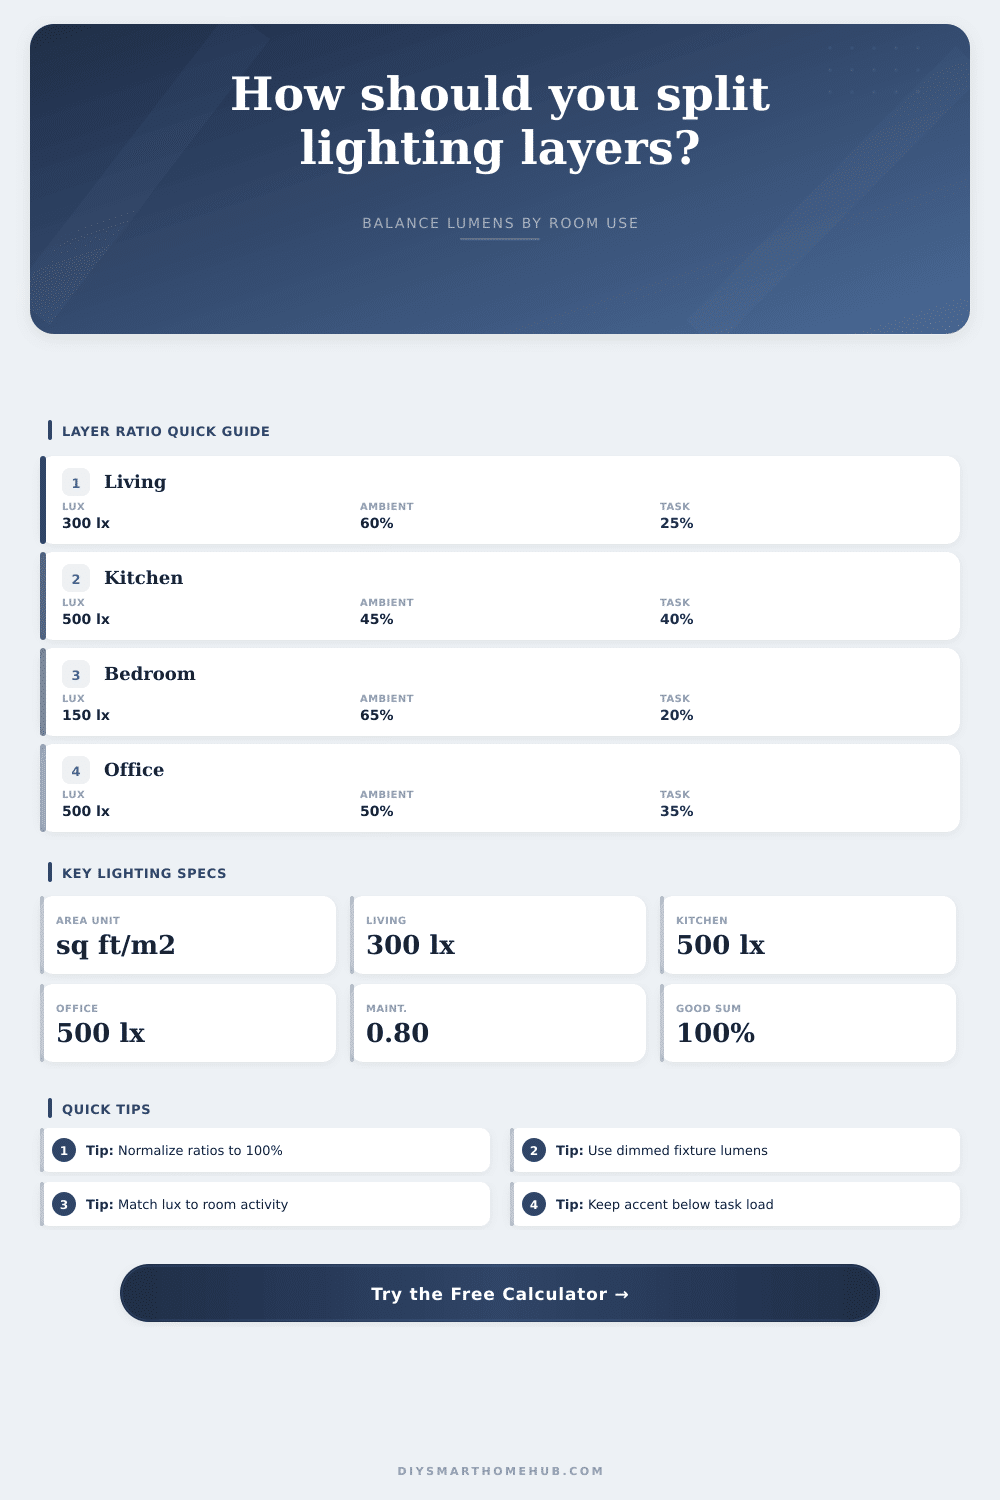
| Bedroom | 100 to 200 lux | 65 / 20 / 15 | Lower target with bedside task support. |
| Living room | 200 to 300 lux | 60 / 25 / 15 | Balanced layers for general use and scenes. |
| Kitchen work zone | 400 to 750 lux | 45 / 40 / 15 | Task layer carries more of the lumen load. |
| Home office | 300 to 500 lux | 50 / 35 / 15 | Task lighting protects desk-plane brightness. |
| Garage work area | 300 to 500 lux | 70 / 25 / 5 | Broad ambient coverage with localized work light. |
| Fixture type | Typical lumens | Layer fit | Dimmer planning range |
|---|---|---|---|
| Recessed downlight | 600 to 1,000 lm | Ambient | 70% to 100% |
| Flush mount panel | 1,500 to 4,000 lm | Ambient | 60% to 100% |
| Under-cabinet strip | 250 to 600 lm/ft | Task | 60% to 100% |
| Desk or reading lamp | 400 to 800 lm | Task | 50% to 100% |
| Wall washer | 500 to 1,200 lm | Accent | 30% to 80% |
| Picture or shelf light | 150 to 450 lm | Accent | 20% to 70% |
| Room example | Area | Target lux | Installed lumens |
|---|---|---|---|
| Small bedroom | 120 sq ft | 150 lux | 2,990 lm |
| Living room | 320 sq ft | 300 lux | 15,936 lm |
| Home office | 143 sq ft | 500 lux | 11,864 lm |
| Kitchen zone | 192 sq ft | 500 lux | 15,936 lm |
| Garage bay | 400 sq ft | 300 lux | 19,920 lm |
| Step | Formula | Input used | Output meaning |
|---|---|---|---|
| Room area | shape area x unit factor | ft, m, or direct area | sq ft and m² |
| Maintained lumens | lux x m² | target illuminance | lumens reaching the plane |
| Installed lumens | maintained / UF / MF | utilization and maintenance | rated fixture lumens needed |
| Layer allocation | installed x layer % | ambient/task/accent ratios | lumens assigned per layer |
| Fixture count | layer lm / dimmed fixture lm | fixture lumens x dimmer % | rounded-up fixture count |
Lighting design is like that: Good design goes unnoticed because when it’s not there, you realize its absence. You enter a room that seems bright enough to see in and yet remains visually dead, as if it were a hospital hallway repurposed as a living space. Adding light isn’t typically the issue. Typically the issue are distributing that light through different layers of the space.
Lighting is something most people think of as one switch on the wall, one throw, turn all the lights on and off. That means harsh shadows or blown out images everywhere. A designer thinks of three types of light. Ambient light provide the base level of seeing what’s around us. We use this to get from Point A to B safely. Task lighting directs some amount of intensity toward tasks that are actualy performed… Reading that contract, chopping those vegetables. Accent lighting highlights architectural detail, art or other textures to add both drama and depth.
How to Use a Lighting Calculator
Now with the calculator (above) you don’t have to guess at what all this means in terms of actual fixture numbers. Simply input your space’s size and your desired brightnesses and it’ll do the math for you. You define the percentage of overall lumens that will be split among each of those three layers. That’s important because the combination of these different layers makes for a more visually comfortable environment than any one layer by itself can achieve. Without doing so, if you depend only on recessed lighting overhead for instance, everything becomes too bright for your art to stand out, and when you’re seated you end up with shadows across your face. Separating responsibilities give you the ability to control the mood of the room while keeping functionality.
The other place where most folks trip up is understanding the inputs, specifically use and maintenance factors. Rather than theory, these coefficients account for the realities of life: light gets absorbed by ceilings and walls en route to your eyeballs, bulbs go bad with age, and light fixtures get dusty over time. If you don’t plan for this, your room will appear nicely lit on Day One…but will become noticeabley dim in a year as your fixtures inevitably age. Maintenance (the second number) represents a 20% penalty for accumulated dust and aging (a “maintenance” factor of 0.80). The tool automatically accounts for this; it’s why the installed lumen count exceed the bare-minimum amount to ensure long-term performance.
The shape of the room is also significant (something most home owners don’t consider). Square rooms behave differently than long narrow hallways, not only do they bounce light around in different ways, but the light must travel further distances. And it’s all translated into metric square meters from imperial feet by the calculator to account for your room shape (circle, rectangle, custom), using lux as the measurement for lumens per square meter in the math. The light will be doing its work at the work plane, which is where your eye is when sitting or standing. That’s why knowing that makes setting realistic targets possible.
For example: You could get away with a hundred fifty lux in a bedroom, assuming you want to be comfy and relaxed there. But a kitchen would require about five hundred lux on the counter top. Knives are precise! Most useful, I think: The output spits out a precise number of each type of fixture needed for each layer. That means it will tell you exactly how many picture lights, under-cabinet strips or downlights to use to achieve your desired ratio. Say your task layer needs 40% of the total lumens; the calculator figures out just how many high-output lights should of be used to cover their share of that demand. (As a side effect of this, you’ll learn why overdoing dimmers can mess things up, as dimming lowers the effective output of each fixture and therefore increases the number needed.)
You don’t want to get caught purchasing only a handful of cheap, low-output bulbs, and then end up with insufficient light on your work surfaces. The trick is knowing which ratio is right, and that comes down to how you’re using the space. Is it a home office? That would lean toward task lighting to avoid eye strain during extended computer time. Is it a dining room? Use more accent and ambient lighting to add some warmth.
That’s why table on the page serves as a guide, offering usual lux target levels per common room. If your own habits don’t fit those norms, feel free to adjust accordingly. But at least having the baseline numbers will keep you from either under-lighting (eye strain) or overlighting (glare + headaches). Balance is key here; we want enough to see clearly, not just as bright as possible.
All in all, layered lighting transforms a space from merely visible to genuinely inviting. It isn’t just about throwing light everywhere; instead, it plays on focus and contrast to add depth. And once you understand how the numbers divide into useful layers, then specifying fixtures for real purposes becomes doable. You won’t make random bulb purchases anymore; instead, you will use a design based off your way of livig.
Understanding what’s really being measured is the key, and makes abstract lumens come alive as something tangible: comfort. When lighting is done well, you don’t even notice it; you only feel the warmth of the room.