Cat6 Bend Radius Calculator
Estimate Cat6 and Cat6A minimum bend radius for installed cable, pulling tension, bend diameter, junction box clearance, bundle bend derating, and pull tension hints for home network routing.
📌Cable routing presets
⚙Cat6 bend inputs
Cat6 bend result
Minimum radius, bend diameter, box clearance, and pull tension hint will appear here.
Calculation breakdown
🖧Cable and routing spec grid
Baseline relaxed Cat6 UTP radius used by the calculator.
Wider sweep used while the cable is moving under pull load.
Shielded cable profile adds radius to protect foil and geometry.
Common one-cable tension check; use the data sheet for final limits.
📏Typical Cat6 cable bend table
| Cable profile | Typical OD | Installed radius | Pulled radius | Bend diameter |
|---|---|---|---|---|
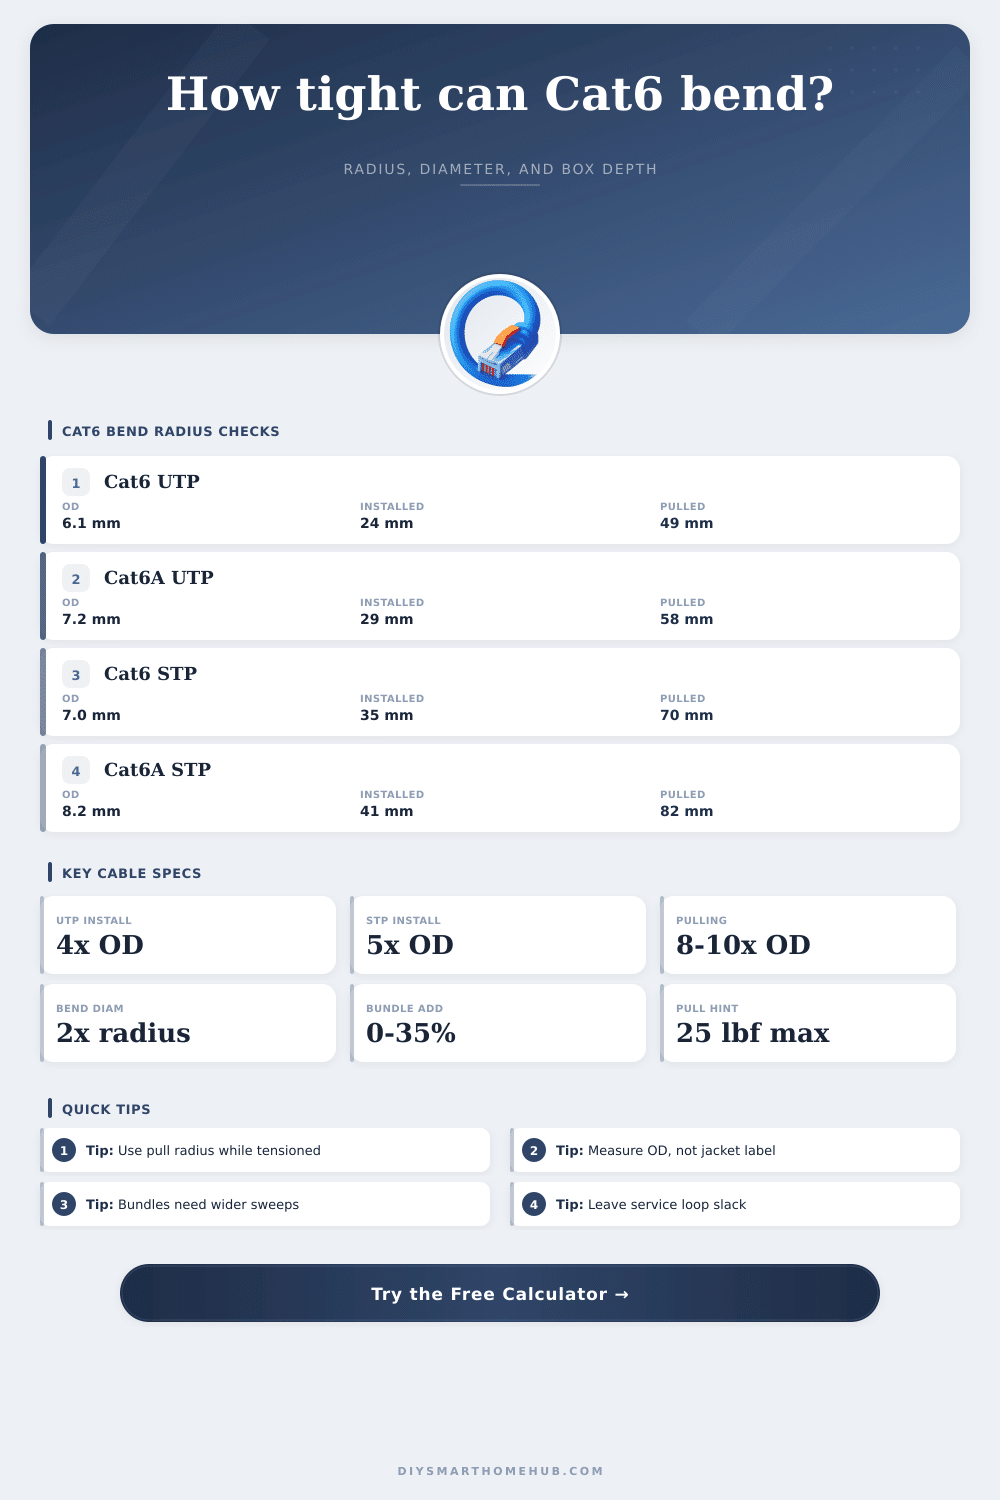
| Cat6 UTP solid horizontal | 0.240 in / 6.1 mm | 0.96 in / 24 mm | 1.92 in / 49 mm | 1.92 to 3.84 in |
| Cat6 shielded F/UTP | 0.276 in / 7.0 mm | 1.38 in / 35 mm | 2.76 in / 70 mm | 2.76 to 5.52 in |
| Cat6A UTP large OD | 0.283 in / 7.2 mm | 1.13 in / 29 mm | 2.26 in / 58 mm | 2.26 to 4.52 in |
| Outdoor Cat6 CMX | 0.310 in / 7.9 mm | 1.86 in / 47 mm | 3.72 in / 94 mm | 3.72 to 7.44 in |
📦Bundle bend derate table
| Bundle count | Loose route | Moderate route | Tight route | Planning note |
|---|---|---|---|---|
| 1 cable | 0% add | 0% add | 5% add | Single cable follows base OD multiplier. |
| 2 to 6 cables | 5% add | 10% add | 18% add | Keep the outside cable from taking the sharpest turn. |
| 7 to 24 cables | 10% add | 18% add | 28% add | Use wider rings, tray turns, or multiple smaller groups. |
| 25+ cables | 16% add | 25% add | 35% add | Large bundles need managed sweeps and strain relief. |
🛠Routing clearance examples
| Route location | Available space | Best state | Watch item | Calculator input |
|---|---|---|---|---|
| Low-voltage wall box | 2.0 to 3.5 in | Installed | Keystone body depth | Box depth + allowance |
| Patch panel rear | 3.0 to 6.0 in | Installed | Bundle fan-out | Bundle count + radius |
| Flexible conduit pull | Sweep dependent | Pulled | Pull tension | Pulled multiplier |
| J-hook or tray turn | Open routing | Installed | Outside cable bend | Bundle derate |
📋Pull tension and bend risk table
| Condition | Radius choice | Tension hint | Length hint | Result note |
|---|---|---|---|---|
| Short relaxed patch | Installed | Low | Under 15 ft | Usually governed by connector clearance. |
| Wall cavity drop | Installed | Light | 15 to 75 ft | Box depth and service loop set the space. |
| Conduit or tube pull | Pulled | Check max | 75 to 150 ft | Use larger bend radius while pulling. |
| Long multi-bend pull | Pulled | Critical | 150 ft+ | High turn count raises pull difficulty. |
💡Bend radius tips
Sometimes you’ve had one of those days in a narrow wall cavity trying to get a cable through a tight turn. Everything looked good on paper but it’s tough to force four pair of copper through a hard turn. That’s what happens when bend radius stops being a theory and starts being a practical limitation. That’s why the calculator does this calculation for you, knowing why helps save you time and effort down the road.
There is a reason for the way the inside of your cables is structured. Bending them too far will distort the structure and crush cable. With higher category cables like Cat6 and above, that distorts the wire impedance. That causes crosstalk. Signals interferes with each other and slow down your high-speed connection. The minimum bend radius is a safety margin to maintain isolation between pairs. Over longer distance, it maintains signal integrity.
Why Bend Radius Matters for Cables
It’s not only about packing the cable in a space. The reason is most folks don’t know the difference between pulling radius and installed radius. The cable looks the same no matter what state it is in, so we tend to think it’s always the same. They aren’t actually. A cable that has been pulled and is now relaxed and held in place can be around a tighter curve.
As you pull the cable down a bay or through conduit, it’s under tension which stretches the jacket. This tension stretch the jacket and puts stress on conductors. That stress needs a bigger arc to avoid causing damage. The multiplier are different when used for pulling than for installation. That little variation in entry point is what keeps it from failing at the end of the run.
What is that? The outside diameter drives everything else. I know what you’re thinking, all Cat6 cables is the same size right? Nope. Unshielded are thinner than shielded (with foil wrap). Gel filled outdoor cable is chunkier. And yes, even the difference between stranded patch cord vs. Solid core horizontal runs also affect this. Use a generic number and you’ll end up with inaccurate numbers. Measure the real jacket instead.
Why does it matter? This is used when calculating how deep a junction box should of go. Box depth is often the silent killer of network projects. Measure the bend radius? Sure. What about the connector? Umm… Forget it! Then there’s the keystone jack, boot and strain relief (all taking up space behind the plate). And if the service loop isn’t included in your cavity depth, then the cable will be under tension… And that’ll degrade its performance over time.
A proper calculation includes those allowances automatically. It provides a realistic clearance target rather than an optimistic one.
Cable bundles add another twist because running several cables together increase complexity. A bundle is not a single cable. The cables on the outside of a bundle bend more sharply then those in the center. So for example, the outside cable(s) has a tighter effective radius. Grouping cables requires decreasing your bend allowance. The calculator accounts for the number of bundles and their layout (tight vs. Loose). Troubleshooting will be challenging later if you ignore this. This results in kinked jacket issue.
Tension is also important. At some point, pulling too hard can risk severing the wires internally. Typically, Ethernet cables are rated for about twenty-five pounds of pull tension. If you exceed that amount, there’s a strong possibility that you’ll cut internal wires. The result will be intermittent faults that cannot easily be traced. Understanding your limits gives you the ability to determine whether to use a pull rope or lubricate. Sometimes it might make sense to go with a longer cable to help minimize friction.
Respecting the bend radius respects the physics of the medium. It respects the fact that data will arrive intact. Planning for the realities of tension, bundles, and boxes in the real world removes the guesswork. From the first twist to the last jack, the signal path is protected. And you can install with confidence because of that. The math protects the network. The network protects your time.