Fisheye Camera Room Coverage Calculator
Estimate whether a single ceiling fisheye camera can cover a room by combining hemispheric FOV, mounting height, dewarped radius, blind spot, corner reach, obstruction loss, and pixels per foot.
Calculation breakdown
| Camera profile | Resolution | FOV model | Dewarp planning use |
|---|---|---|---|
| 5MP ceiling fisheye | 2560 by 1920 | 180 deg hemisphere | Small rooms, bedrooms, offices, and clean ceilings |
| 8MP / 4K fisheye | 3840 by 2160 | 180 deg hemisphere | Better edge detail in living rooms and open zones |
| 12MP high-detail fisheye | 4000 by 3000 | 185 deg wide cap | Large rooms where dewarped PPF matters |
| Dual-lens 360 room camera | 4096 by 2048 | 360 deg panorama | Room awareness with more stitching and edge softness |
| Doorway panoramic camera | 2560 by 1440 | 180 deg wall view | Entry walls, counters, narrow rooms, and halls |
| Mount location | Corner behavior | Overlap need | Coverage note |
|---|---|---|---|
| Ceiling center | Shortest far-corner distance | Lowest | Best one-camera placement for rectangles and square rooms |
| Off-center ceiling | One or two corners become limiting | Moderate | Useful when lights or vents block the true center |
| Near wall / soffit | Opposite wall corners drive the gap | High | Works for shallow rooms but struggles across deep spaces |
| Near corner | Diagonal corner is the limiting point | Highest | Often needs a second camera or a narrower target zone |
| Edge PPF | Detail level | Typical use | Planning caution |
|---|---|---|---|
| 8-12 ppf | Detection | Motion, occupancy, and general room context | Fine detail is weak after dewarping |
| 15-25 ppf | Recognition | General activity review and familiar-person recognition | Good default target for broad indoor fisheye coverage |
| 30-45 ppf | Identification | Clearer faces or objects within the room | Usually requires 4K or smaller floor radius |
| 50+ ppf | Detail view | Small labels, hands, counters, and close work zones | Not realistic at wide room edges from one ceiling fisheye |
| Obstruction type | Factor | Model effect | Why it matters |
|---|---|---|---|
| Clear ceiling | 1.00x | Full radius | Cleanest hemispheric view and lowest blind-area penalty |
| Nearby light fixtures | 0.93x | Small area loss | Fixture glare and occlusion reduce usable dewarped edges |
| Ceiling beams / soffits | 0.86x | Moderate area loss | Long shadows or blocked arcs can hide corner floor zones |
| Ceiling fan sweep | 0.76x | Large area loss | Moving blades can mask or blur useful frames |
| Tall shelves / hanging items | 0.68x | Severe area loss | Vertical objects remove floor and doorway visibility behind them |
Center ceiling
Usually gives the best single-camera result because the circular floor projection reaches each corner with the smallest radius.
Off-center ceiling
Useful around lights, vents, or sprinklers. Check the corner gap because one side can lose coverage quickly.
Wall or soffit
Good for shallow rooms and counters, but the opposite edge often needs overlap from another camera.
Corner mount
Can watch an entry path well, but it is rarely the best option for full-room fisheye coverage.
The first thing you notice when you install a fisheye camera is lens angle. It’s supposed to see an extreme wide view, showing everything in the room in one big bubble. That sounds like security theater, but turns out it works pretty well if you know how geometry work.
The key is understanding where the real world stops and distorted blur starts. Having a one hundred eighty degree field of view doesn’t mean you’ll get clear images on outside. But there’s a calculator up top that will do all the work for you. Given the dimensions of your space and height of your ceilings, it’ll estimate the effective radius of coverage… Which is important because a fisheye casts hemisphere onto a flat screen. As pixels stretch out toward the perimeter, they gets stretched thin.
How to Use Fisheye Cameras
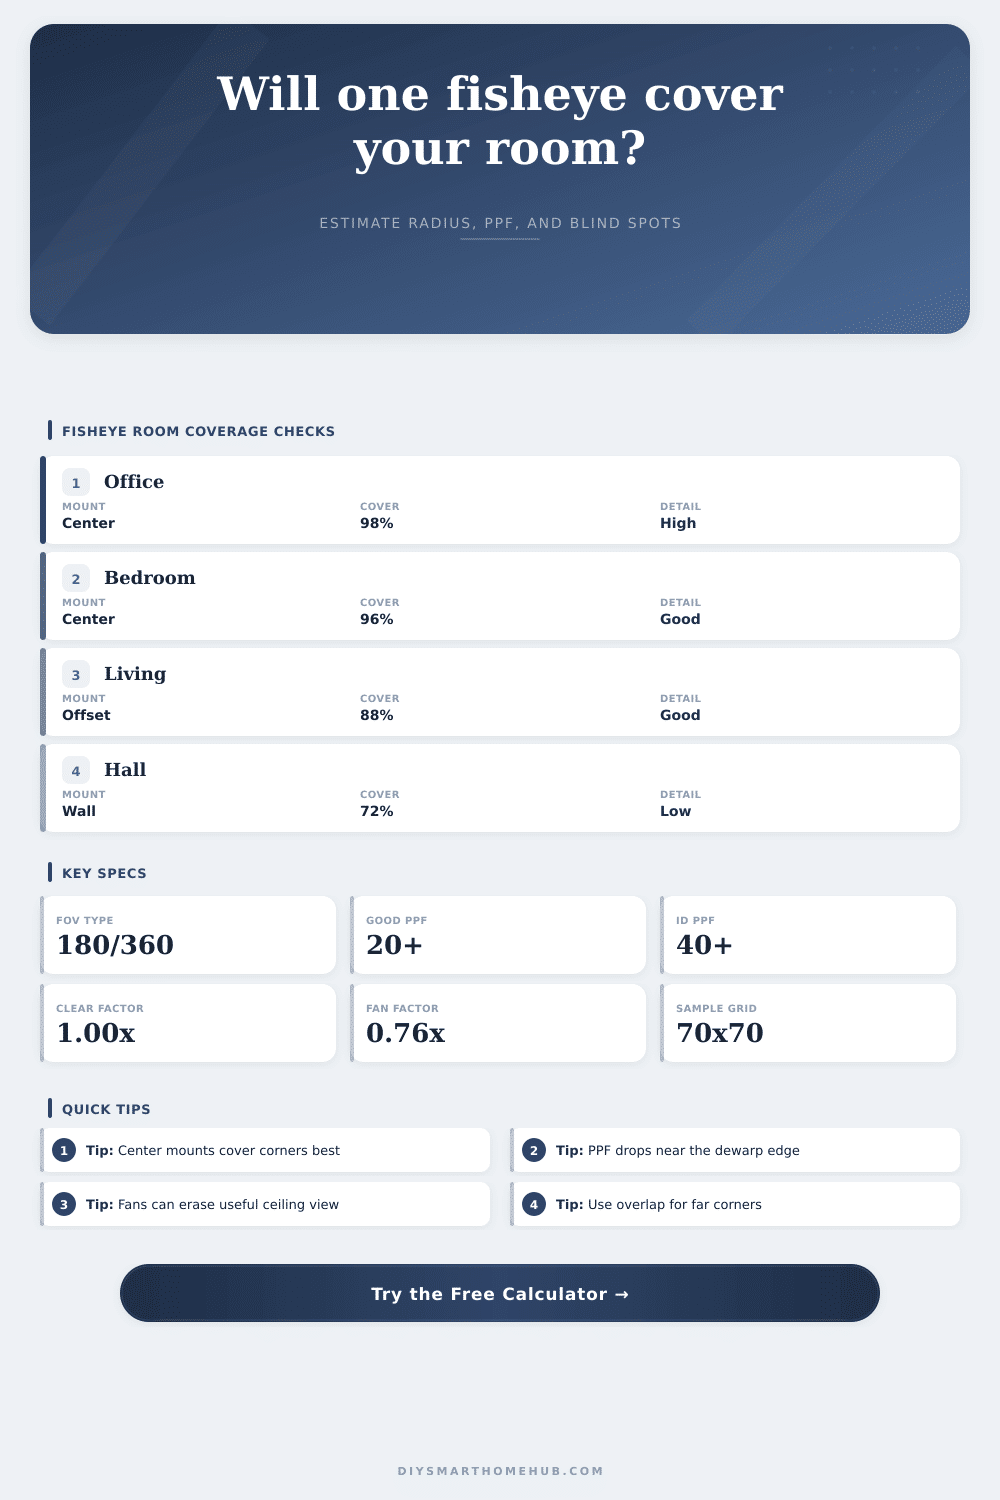
So while you may see ninety-eight percent coverage in a small office where camera is mounted in the middle, that high percentage could still mean that corner pixels are too blurry to read someone’s face. Use the tool to help you separate seeing a room vs. Actualy monitoring it. It also calculates the pixel density at the periphery.
It all depends on where you mount it. Most everyone assume that in the middle is best. In square rooms it usually is. But if your room has an odd shape (or even a long hall) then mounting position do change. Placing the camera against a wall or offsetting it from center will change blind spot direction.
The diagram on the page marks the corners and shows what the corner reach is for various locations. Depending on your situation, a wall mounted camera may not cover other side of the room at all. A corner mount may struggle to cover area across diagonal. And this really comes down to you, what are you trying to cover? Do you want two adult-sized sofa covered the most? Or is that back door the main area of interest? It’s a question of depth versus breadth.
Another quiet killer of coverage are obstructions on the ceiling. Don’t think of a ceiling fan as merely a decorative element. Think of it as a moving blocker. Those blades cuts across the camera’s field of vision when the fan is running, they obscure (or at least blur) what’s happening down on the floor below. The calculator considers a reduction factor here. It recognizes that those areas don’t yield any useful information.
The same goes for other objects that might hang overhead such as exposed beams or hanging light fixtures. These too throw off shadows that conceal action. The ideal scenario is a clear ceiling. Reality check: Not many real-world houses are so tidy. What dangles in midair between lens and floor needs consideration.
Then there’s resolution. That too is a factor. It does not work the way marketers say it do. Increasing the number of pixels does improve things. This is especially true when the image is dewarped to a normal rectangle, so the more megapixels, the better. A 12mp sensor holds on to more edge detail then a 5mp. But resolution alone won’t solve an off-angle shot.
A high ceiling makes the floor look larger, taking up more space than a good sharp picture can capture. This is where pixel per foot calculation comes in. You might have a density low enough to pick up movement but it’ll be too low to catch any details. It needs to be high enough to identify something. We often aim to identify things.
The variable here that the calculator does not fully account for are lighting. A fisheye lens will pick up a great deal of light. A fisheye lens will distort the exposure. A bright part of the room can skew the exposure so that it overexposes the lights, it may crush the shadow. The footage might look perfect on paper. In practice, you might end up with unusable footage.
Always check the camera’s actual night mode performance in specific room. Don’t just trust the numbers. One camera can cover a lot of ground, but it cannot cover everything with equal clarity. Mounting one camera can do a lot. One cannot do everything at once.
Fill the frame? No. Not that either. Filling the frame is about filling it with information. Avoid common mistake of assuming wide angle equals wide detail by checking pixel density and gaps in corners. Do not think wide angle = wide detail.
A clear ceiling mounted in the center is usually best. Sometimes the shape of your room requires compromise, you should of checked first. Before mounting the hardware, you need to know where your blind spots are. Knowing that turns your basic surveillance setup into a precise security strategy.