Camera Mounting Height for Coverage Calculator
Model a camera's mounting height, target distance, vertical field of view, down-tilt angle, ground coverage limits, blind zone, and pixel density before choosing a final exterior camera position.
Full calculation breakdown
| Item | Formula | Required inputs | Planning meaning |
|---|---|---|---|
| Required tilt | atan((height - target height) / target distance) | Mount height, target height, target distance | Camera angle that points the optical center at the target. |
| Ideal height from tilt | target height + target distance x tan(tilt) | Tilt, target distance, target height | Mounting height that makes the entered tilt center the detail point. |
| Near ground edge | height / tan(tilt + VFOV / 2) | Height, tilt, vertical FOV | Closest ground point visible below the camera. |
| Far ground edge | height / tan(tilt - VFOV / 2) | Height, tilt, vertical FOV | Farthest ground point if the upper ray points downward. |
| Goal | Typical target | Approx px/ft | Use when |
|---|---|---|---|
| Scene overview | Know something happened | 20 px/ft | Wide yard or patio awareness. |
| Recognition | Recognize a known person | 40 px/ft | Porch, walkway, and side gate views. |
| Face detail | Capture more useful facial detail | 60 px/ft | Main entry and close driveway zones. |
| Strong ID | High-detail person view | 100 px/ft | Narrow lanes and controlled approach points. |
| Plate/detail | Vehicle or small object detail | 130 px/ft | Short, narrow choke points with careful aiming. |
| Scenario | Height | Target distance | Profile | Expected result |
|---|
| Mounting band | Typical height | Usual tilt | Coverage behavior | Best fit |
|---|---|---|---|---|
| Door-level detail | 4.5-6 ft | 0-12 deg | Very small blind zone, limited tamper resistance. | Doorbell or eye-level entry view. |
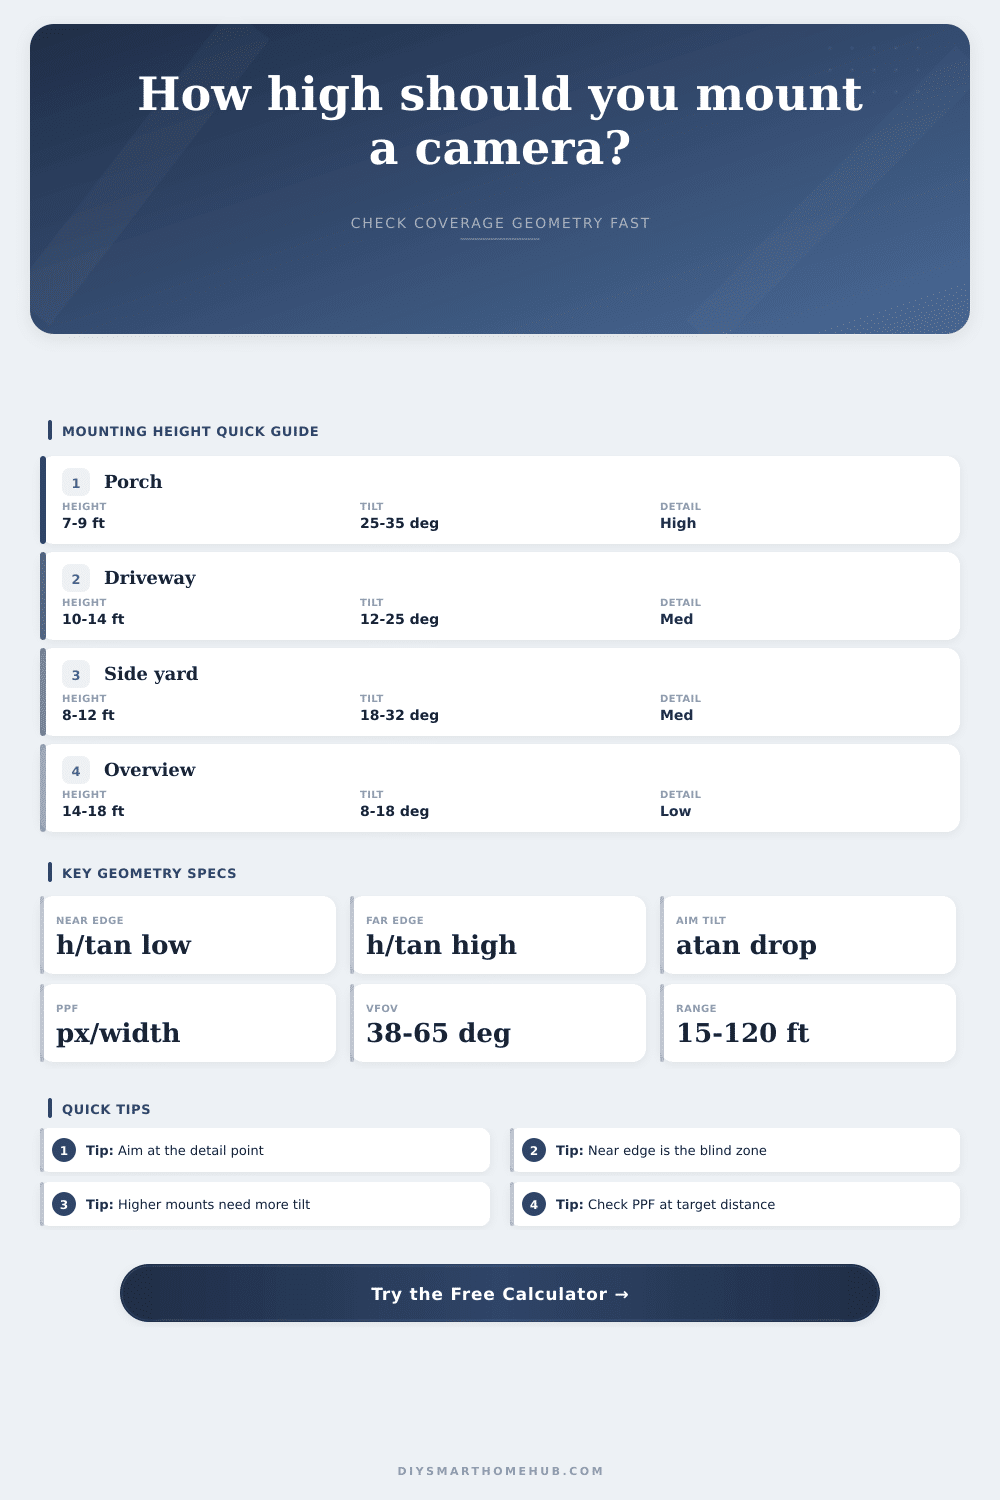
| Low eave | 7-9 ft | 18-35 deg | Good face angle with manageable near blind zone. | Porch, gate, and patio doors. |
| Standard eave | 10-14 ft | 10-28 deg | Good driveway and side-yard balance. | Garage, side path, rear yard. |
| Second story | 15-22 ft | 8-22 deg | Large overview, weaker close face detail. | Wide scene awareness only. |
Install a camera: You want to be able to see clearly? However, it depends on how much of world you can fit in frame (resolution) and how clear it is within that frame (geometry). If your mount puts you up high enough that you have a blind spot directly in front of house… or you point your lens at the sky, having a 4k sensor are useless. Most folks guess and hope.
No more; this calculator will handle the trigonometry and let you plan instead of guessing. Guess. That’s where mounting height comes in. Everything else about your system hinge on this one variable.
How to Pick the Right Camera Height
Mount too low (e.g., eye-level) and you’ve got two issue: Your camera is vulnerable to vandalism, and its vertical field of view stretch well beyond the back of house. Recording nothing but air. But go too high (such as 20 feet up on a second-story eave), and your angle becomes too extreme, making faces appear as though they has chins. The light hits their faces at an unfavorable, downward-looking perspective, making all the data needed to identify them useless.
For most residential use case, somewhere between eight and twelve feet is ideal. It should be high enough to deter tampering, yet low enough to capture a natural angle that retains important facial details.
You select your height and now we’re getting to the details. What exactly do you want to shoot (aka what’s the target)? Is it the front doorstep? Is it the threshold of driveway? Enter those numbers into the tool plus the expected height of your subject (five feet for a human face). From there, the calculator do the math on the exact down-tilt angle needed to have them dead-center in frame.
That’s important because cameras doesn’t come endlessly adjustable. Maybe the math indicates a thirty-degree down-tilt but your bracket only swings twenty. No amount of fiddling will ever give you a clean shot. And knowing that ahead of time mean no wasted holes drilled.
Here’s where expectations typicaly meet reality: pixel density. Having a camera that shoots in four K doesn’t necessarily translate to high def footage from each foot of your lawn. Pixels expands out through the field of view as if they’re buttered onto toast. Too much area and you has a thin layer of resolution.
At the range you want to shoot, the tool compute the number of pixels per foot. Sixty or more pixels per foot is about what you’ll need for facial recognition to be effective. Less than this, and it will see only a blurry blob shaped vaguely human-like but reveal nothing of its identity. Better to have some portion of it well resolved rather than a large swath with nothing resolved at all.
The Near Ground Edge Blind Zone This is the theoretical blind spot, i.e., the practical blind zone, there’s nothing we can do to change the fact that the camera won’t see straight down past the camera lens, regardless of how far we tilt it downward. The calculator shows you exactly where this shadow begin. Anything within this area cannot be brought into view regardless of how you adjust the camera. Either lower the camera or move the mount; anything else will get you nowhere. Aiming for something on the other side of this line is a frequent error that this metric correct.
Height affects lens choice in unexpected ways. A wide lens will capture more of what’s up and down from the center line, which is forgiving on mounting heights but sacrifices pixel density at long ranges. A narrow lens will throw detail farther down the driveway while demanding accurate aiming. The tool comes with presets that represent typical industry lenses so you can play with real-world choices instead of imaginary optics.
On paper: Planning beats adjusting from a ladder. No rewiring cables; no re-climb up scaffolding. Run a few quick scenarios. See how wide an angle works if you mount lower? How about narrower and higher? The numbers speaks about what really gets you the resolution you need at the distance you care about. Positioning is more important then problem solving. Once the geometry works, install is easy. Mostly good surveillance should of been math masquerading as hardware.