Deck Lighting Spacing Calculator
Estimate deck surface light spacing, fixture count, rail run lights, stair lights, target lux, overlap, beam spread, post spacing, and control zones.
This calculator estimates planning spacing from beam geometry and delivered lumens. Outdoor readings vary with deck color, fixture shielding, lens dirt, railing shadows, and exact aiming.
Deck Lighting Results
| Deck zone | Target lux | Typical fixtures | Calculator use |
|---|---|---|---|
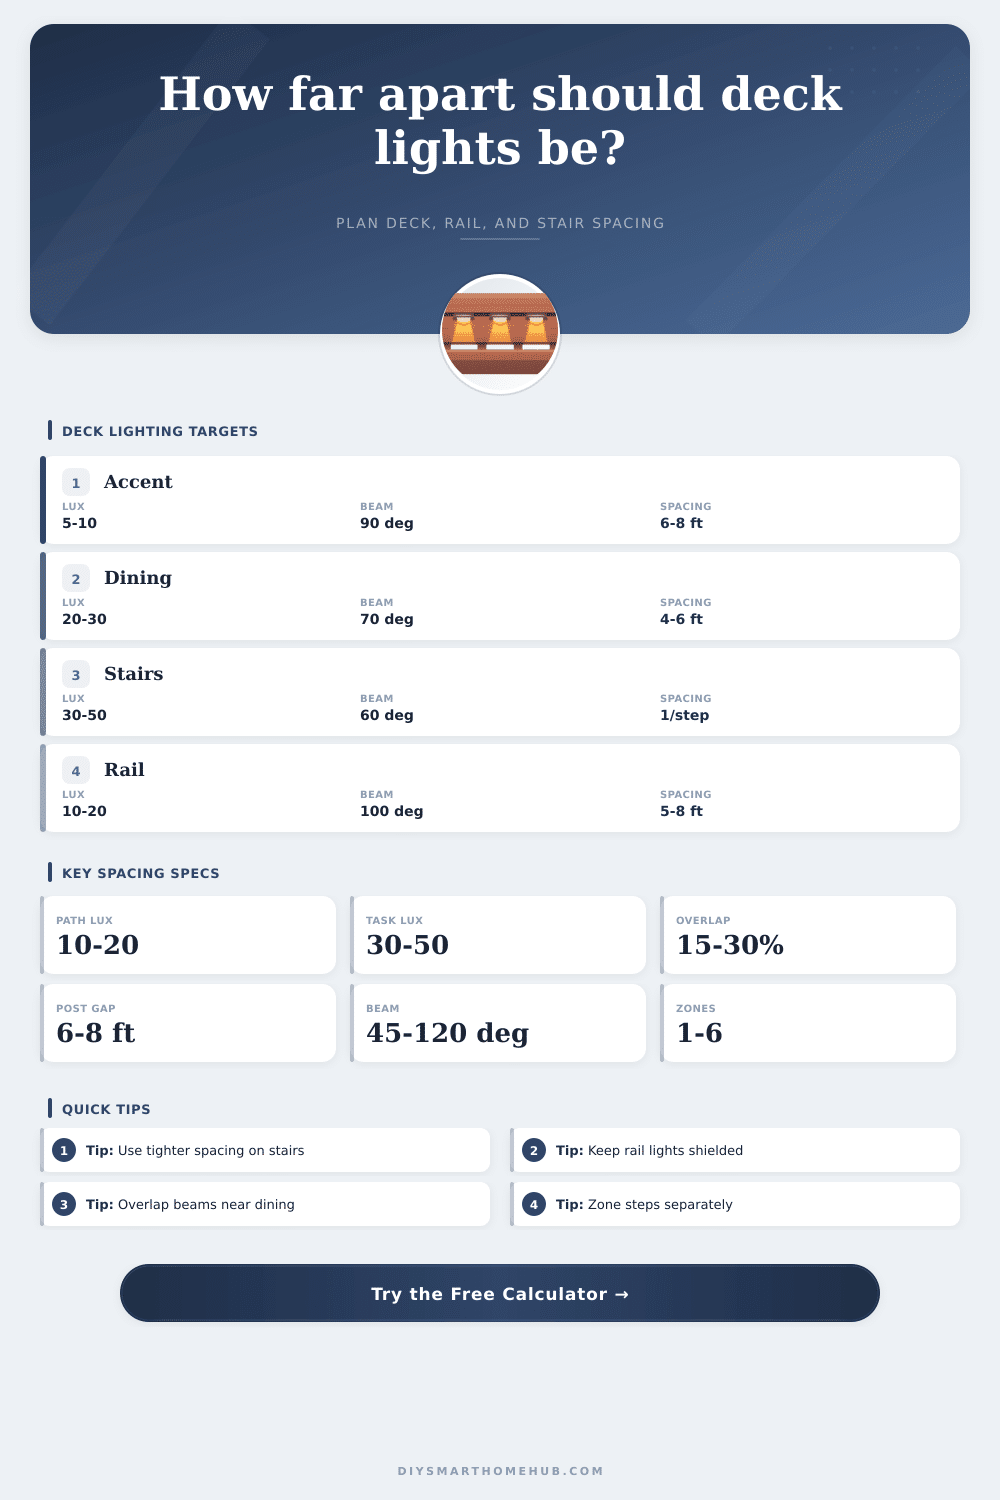
| Accent perimeter | 5 to 10 lux | Post caps, rail glow, low puck lights | Low target with wider spacing and softer contrast |
| General walking | 10 to 20 lux | Recessed pucks, rail lights, sconces | Good baseline for paths and casual deck circulation |
| Dining or lounge | 20 to 30 lux | Post lights, sconces, string zone, downlights | Raises lumen requirement without making stairs too bright |
| Grill or serving | 30 to 50 lux | Directional sconce, bollard, focused downlight | Use as a dedicated zone if only part of the deck needs task light |
| Stairs and transitions | 30 to 50 lux | Riser lights, side lights, cap lights | Calculator adds a separate stair count to the surface layout |
| Fixture type | Typical output | Beam behavior | Best spacing use |
|---|---|---|---|
| Recessed deck puck | 60 to 160 lm each | Low glare, medium beam, low mounting height | Surface points, edge markers, small landings |
| Post cap light | 80 to 220 lm each | Broad downward wash from rail height | Rail rhythm, perimeter glow, posts at 6 to 8 ft centers |
| Under-rail linear | 120 to 350 lm per meter | Continuous side wash with shielded output | Long rail runs and low-glare seating zones |
| Stair riser light | 30 to 80 lm each | Short throw across each tread | One per step or alternating on narrow stairs |
| Sconce or wall light | 250 to 900 lm each | Higher output and larger beam footprint | Dining, grill, door, or larger deck zones |
| Bollard or path light | 100 to 350 lm each | Low broad pool with cutoff optic | Deck edge, ramps, and transitions to yard paths |
| Beam angle | Mounting height | Raw beam diameter | Spacing with 25% overlap |
|---|---|---|---|
| 45° spot | 2.5 ft / 0.8 m | 2.1 ft / 0.6 m | 1.6 ft / 0.5 m |
| 60° medium | 3 ft / 0.9 m | 3.5 ft / 1.1 m | 2.6 ft / 0.8 m |
| 90° wide | 3 ft / 0.9 m | 6.0 ft / 1.8 m | 4.5 ft / 1.4 m |
| 110° broad | 3.5 ft / 1.1 m | 10.0 ft / 3.0 m | 7.5 ft / 2.3 m |
| 120° diffuse | 6 ft / 1.8 m | 20.8 ft / 6.3 m | 15.6 ft / 4.8 m |
| Deck project | Deck size | Lighting target | Common spacing result |
|---|---|---|---|
| Small landing | 8 x 10 ft | 10 lux, 4 steps | 4 to 6 surface lights plus stair lights |
| Townhouse deck | 12 x 16 ft | 15 lux, one rail run | 6 to 9 surface lights with 6 ft rail rhythm |
| Dining deck | 16 x 24 ft | 25 lux, 3 zones | 12 to 18 surface lights depending fixture lumens |
| Pool deck edge | 14 x 32 ft | 20 lux, long rail edge | More rail lights, lower glare, moderate surface count |
| Large entertaining | 26 x 38 ft | 30 lux, 5 zones | Zone the dining, rail, stair, and lounge groups separately |
For final placement, keep fixtures out of direct eye lines, keep stair lights consistent from top to bottom, and verify any low-voltage layout against the fixture manufacturer's limits.
You don’t see good deck lighting because many of us thinks of it as indoor overhead lights. At night, you walk out on your deck. What do you see? It is probably just a flat, empty space covered in shadows. It is too dim to be mysterious. The light are too spotty to be functional. One corner is blazing, another’s as dark as the dining room table. Oops, there’s that potted plant again (another foot-trip victim).
Why? Most people chooses their fixtures based off nothing except what they liked, then placed them randomly, hoping some kind of magic would of result. In truth, deck lighting need to be a lot more geometric. It should controls the placement of its own light, guiding feet without blinding faces. It is a tiny detail, but it is bigger than raw brightness could ever be.
How to Space Your Deck Lights Correctly
But it’s all about overlap and beam spread. Each light produce an illuminated cone that gets smaller the farther it goes until reaching the floor. When you space those lights too far away from one another you end up with gaps, dark areas between lights. This doesn’t create an atmosphere; it just creates visual clutter.
The calculator (above) will do the math for you after plugging in your fixture details and room dimensions. You don’t have to guess at conversions or coefficients anymore. It take into account the beam angle, mounting height and desired amount of overlap and tells you exactly how far apart each fixture needs to be. That’s where everyone falls short. They think more about lumens different than geometry.
Think about the difference between the stairway and the dining area. These areas is totally opposite. On stairs, you need high-contrast, precise lighting on each tread, so nobody trips, while in the dining space, you want a nice, soft wash of light, enough to make the food look good and conversations easy. That typically require tighter spacing (no chair shadows) and wider beam angles.
By allowing you to establish zones with unique lux goals, the tool will help you tell these requirements apart. For instance, you could set the goal at twenty lux over the dining table but thirty-five lux on the stairs. It’s more than just safety. It’s visual hierarchy.
Where do you want your eyes to go? Do you want them to go to the people or the perimeter of the deck? And then there’s all the other stuff, like rail and post lighting. Clean-looking post caps is popular, but they don’t project far (the farther away from them you get, the dimmer it will be). With an eight-foot post separation, a standard cap will create dark spaces between each one. Four-foot long dead spots along the railing.
The calculator factors in how post cap output drop off quickly by adjusting for both total length of rail run and actual post separation. Depending on desired drama, you may wish to illuminate alternate posts only. Alternating costs less. Lighting every post provide a steady glow that clearly defines the perimeter of the deck.
Remember: Maintenance matters! Bird poop, pollen, dust and other goop accumulate on outdoor lights at an alarming rate. That brand-new fixture with its spotless lenses can become half-opaque by October. That’s where the loss factor input comes into play. Slightly over-specifying the original design allow for the fact that a certain amount of light will be lost due to aged components or dirt. Without that little bit of extra, your carefully designed lighting scheme will be looking sad and dim next season. Ten percent? It is not a luxurius. It is an insurance policy. Against the outdoors.
And lastly, consider the mounting height. Deck pucks recessed into the surface hover just inches off it, casting shallow pools of light so wide they show you where to place each foot, no glare involved. Lights mounted higher up on rails or walls throw longer, narrower beams of light. This variable affect how far apart the calculator recommends placing them, since obviously a high-mounted light projects further, but must also be spaced carefully enough to prevent darker shadows next to the wall.
Match the behavior of the fixtures to the way your deck actualy lies out there. What lighting is really all about is not so much putting up light bulbs as it is creating sight lines. Get the spacing correct, and then the lights becomes invisible. You don’t notice them. Instead, the space feels finished, complete, inviting, and safe. And that’s what we’re after, the seamless integration. A wood platform become a room with no walls. Spots of carefully placed warmth is there to greet you when you walk out into the evening from dinner. It’s these pools of light that define the space, not the shadows.