Pathway Light Spacing Calculator
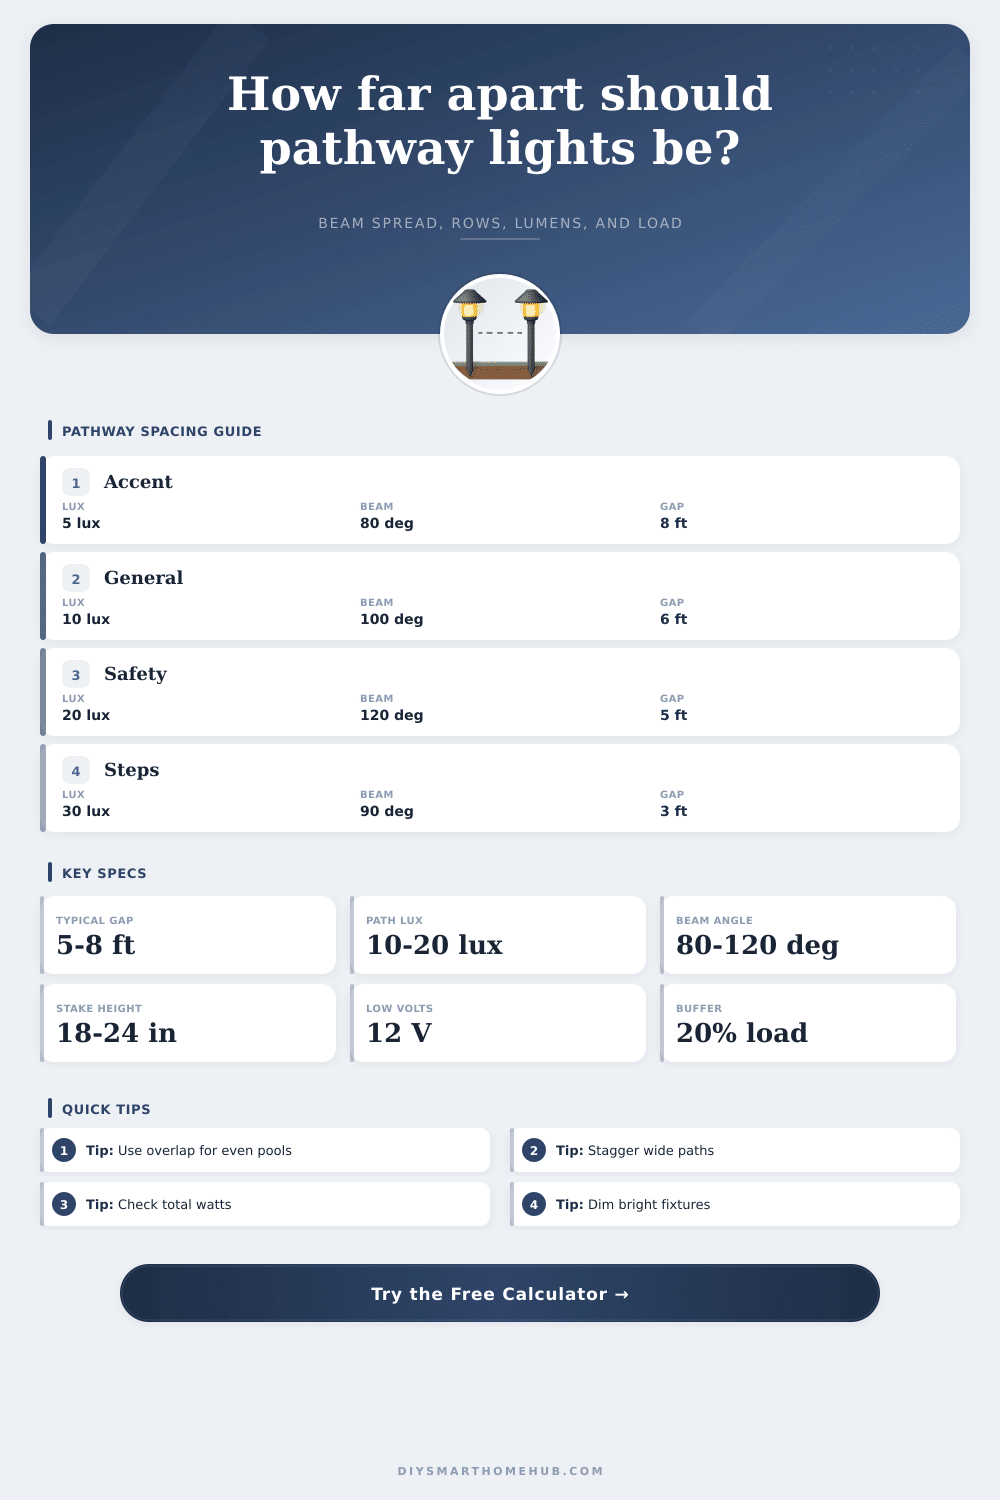
Estimate fixture spacing from path length, beam spread, overlap, row layout, target light level, lumens, watts, and low-voltage capacity.
Calculation breakdown
| Fixture type | Typical beam | Planning spacing | Best calculation use |
|---|---|---|---|
| Shielded mushroom path light | 80° to 110° | 5 to 7 ft | Controlled pools along narrow walks. |
| Wide hat path light | 100° to 130° | 6 to 9 ft | Soft coverage where fixtures can sit lower. |
| Short bollard | 120° to 160° | 7 to 12 ft | Broad paths, entries, and wider circulation zones. |
| Low marker puck | 45° to 80° | 3 to 5 ft | Edge definition and low-brightness guide points. |
| Step or riser light | 60° to 100° | 2.5 to 4 ft | Short intervals where foot placement matters. |
| Low-angle mini spot | 25° to 60° | 3 to 6 ft | Directional accents that should not wash the full path. |
| Linear edge wash | 110° to 140° | 4 to 8 ft modules | Continuous edge glow with reduced scalloping. |
| Lantern-style path light | 90° to 130° | 6 to 8 ft | Decorative visibility with moderate overlap. |
| Source height | 80° beam footprint | 110° beam footprint | Spacing with 25% overlap |
|---|---|---|---|
| 12 in / 30 cm | 1.7 ft / 0.5 m | 2.9 ft / 0.9 m | 1.3 to 2.1 ft |
| 18 in / 46 cm | 2.5 ft / 0.8 m | 4.3 ft / 1.3 m | 1.9 to 3.2 ft |
| 24 in / 61 cm | 3.4 ft / 1.0 m | 5.7 ft / 1.7 m | 2.5 to 4.3 ft |
| 30 in / 76 cm | 4.2 ft / 1.3 m | 7.1 ft / 2.2 m | 3.1 to 5.4 ft |
| 36 in / 91 cm | 5.0 ft / 1.5 m | 8.6 ft / 2.6 m | 3.8 to 6.4 ft |
| Zone goal | Target lux | Approx foot-candles | Spacing implication |
|---|---|---|---|
| Decorative edge cue | 3 to 7 lux | 0.3 to 0.7 fc | Can use wider gaps if pools are intentional. |
| General walkway | 8 to 15 lux | 0.7 to 1.4 fc | Moderate overlap improves visual rhythm. |
| Entry or turn zone | 15 to 25 lux | 1.4 to 2.3 fc | Shorten spacing or raise fixture lumens. |
| Steps and level changes | 25 to 40 lux | 2.3 to 3.7 fc | Use close intervals and check beam width. |
| Long security route | 20 to 35 lux | 1.9 to 3.3 fc | Plan load capacity before increasing counts. |
| Total fixture watts | Capacity reading | 12 V current | Calculator interpretation |
|---|---|---|---|
| Up to 40% of capacity | Very light load | Watts / 12 | Ample driver headroom for dimming and allowances. |
| 40% to 70% | Balanced load | Watts / 12 | Usually a comfortable planning range. |
| 70% to 80% | Near planning limit | Watts / 12 | Watch added fixtures and future expansion allowance. |
| Over 80% | Reduce or split load | Watts / 12 | Calculator flags the load as capacity constrained. |
| Scenario | Path size | Spacing target | Typical row choice |
|---|---|---|---|
| Front walk | 25 to 40 ft by 3 to 5 ft | 5 to 7 ft | Single edge or staggered entry side. |
| Curved garden path | 35 to 60 ft by 3 to 4 ft | 4.5 to 6.5 ft | Single edge following curve radius. |
| Wide stone path | 40 to 70 ft by 5 to 7 ft | 5 to 8 ft | Staggered rows for even width coverage. |
| Step approach | 10 to 25 ft by 3 to 5 ft | 2.5 to 4 ft | Close single row or riser lights. |
| Long side route | 60 to 100 ft by 3 to 4 ft | 5 to 8 ft | Single edge with load checked early. |
New pathway lights might appear more like a row of campfires than a gentle guide. In fact, lighting may be perfectly adequate; the wiring is probably okay. What’s the issue? It is almost certinly the gap between them.
It’s one thing to see the path…and another thing to see each individual light source blinding you in the face. That’s where overlapping meets width of beam, so there’s just enough illumination for safe walking. But no visual noise that spoils the mood of garden.
How to Space Your Pathway Lights Correctly
That’s the geometry part, the part you plug into the calculator above, which I designed to do the number-crunching based off whatever width and height of fixture you have and whatever length of path you need to illuminate. How far apart should those lights sits so that there is no gap at all, just one long pool of light instead of multiple bright spots with dark space in-between? And why does it matter?
We see not so much what is bright but how it transitions. Too much spacing (too few lights) result in tunnel vision; the dark areas between lights eat up the sides of walkway. Too little spacing means the glare builds up until the pathway look like a runway for small aircraft.
The calculator figures out the spacing from center to center. It take into account your particular beam angle and how closely or widely you wish to overlap lights for smoothness. Most folks go astray in area of beam angle: wider is not necessarily better.
On paper, a beam that spreads out 110 degrees sounds great; but it means light reaches the ground nearer the stake and then fades sooner as it extends out into pathway. Nearer beams extend farther but need more fixtures to span the same distance while avoiding shadows. It’s all about defined circles versus pools of spread light; pick what matters to you.
The chart on the page clearly shows how footprints vary by angle and height. A 24-inch stake, even if throwing wide, doesn’t shine as far as a 36-inch bollard with a tighter beam. And that’s despite emitting equal numbers of lumens.
Spacing strategies take into account another surprising factor: height. For any given fixture, the farther away you place it, the larger its area of coverage (so long as it’s mounted high enough). That’s why, for example, bollards on a wide driveway may be placed six feet or even eight feet apart; but low marker pucks at edge of garden will have to be spaced very closely to each other.
The tool takes this into consideration, factoring in coverage diameter depending on the height you enter. Although it sounds like a minor detail, it makes all the difference when you are looking to achieve a certain look with lighting without doubling your runs of wire. Higher fixtures provide that reach/use, but can absorbs out the ground textures if spaced too far. Lower ones create intimacy, and must be spaced densely enough to prevent shadows from bumps in terrain or nearby shrubs.
The unglamorous aspect that will save you from system failure down the road is load management. Lights pull power; more lights mean more power; lights pulled close together pull more power fast. The calculator tells you how much power you’re pulling vs how much transformer can handle to keep you safe before a circuit is overloaded.
A general rule of thumb is to stay under 80% of the driver’s rated load. That gives you some breathing room for voltage drop on lengthy runs and it lets you grow without stressing the system. It’s better to leave the juice available than to be chasing flickering lights due to an overstressed transformer.
For wide paths, staggered rows completely change the dynamic. Offsetting the fixtures on one side vs. Lining them up on both makes the light feel more organic and also covers the center of walkway more evenly with a kind of woven pattern. The trick is using fewer fixtures than two parallel lines because the light from opposite sides crosses in the middle to blend.
It is a tradeoff between coverage efficiency and visual rhythm. The tool shows you exactly how many stakes is needed for the staggered look, and adjusts the count as such.
In the end, what you really want out of pathway lighting is not just lighting of the ground but also a leading of the eye. This means you don’t want blinding light from source that makes it hard to see where you are walking, but you do want enough light to see where you are walking. So adjust the beam angle and tweak the overlap percentage in the planner, and you can preview how these decisions will manifest into final scene before buying a single bulb.
Ideally, you want a smooth mixture of light and shadow that feels like an invitation along the path rather than engineering. Done well, no one notices the lights. It is just the way.